Published by Jeremy. Last Updated on April 13, 2023.
Disclaimers: Our site uses demographic data, email opt-ins, display advertising, and affiliate links. Please check out our Terms and Conditions for more information. Listed prices and attraction details may have changed since our visit and initial publication.
If you are traveling to Africa to go on safari, odds are good you want to capture some incredible photos.
We would be suspect if you did not.
Capturing an amazing shot while on safari can help you remember all the fun you had and the dozens upon dozens of animals you are sure to see.
But I have to make a confession- getting great photos on safari is hard. So hard, in fact, that even after visiting half a dozen of countries for safari experiences, I have still missed out on many shots due to various issues like not having the best equipment, poor timing, or other issues altogether.
So in this one, I wanted to share some of my most important tips when it comes to taking photos on safari and help you avoid some of the mistakes I have made in the past!
✈️ Book Your Next Trip
- • Planning a trip? Find a flight deal.
- • In need of a room? Check out hotel and apartment prices.
- • Taking a cruise? Find a cruise itinerary for your journey.
- • Don't overlook picking up a rental car or day tours as well!
Telephoto Lenses Do the Trick (Most of the Time)
Before getting on a plane and heading to Africa for safari, the first thing you need to know is that most conventional cameras won’t cut it. While many camera bodies are immensely powerful these days to offer the settings you need, it is your lens that will often come up short.
This is because most animal viewing experiences you may have on safari will have the animal 20, 50, 100, or 500+ feet away from you. This is not to say that you won’t get lucky and have a lion or cheetah walk right past your vehicle (we have had both), but rather that, more often than not, your animal viewing will be at a further distance away.
If your camera lens can only go up to 55mm focal length, for example, odds are good you simply won’t get a great shot as the animal you are trying to take a picture of is too far away.
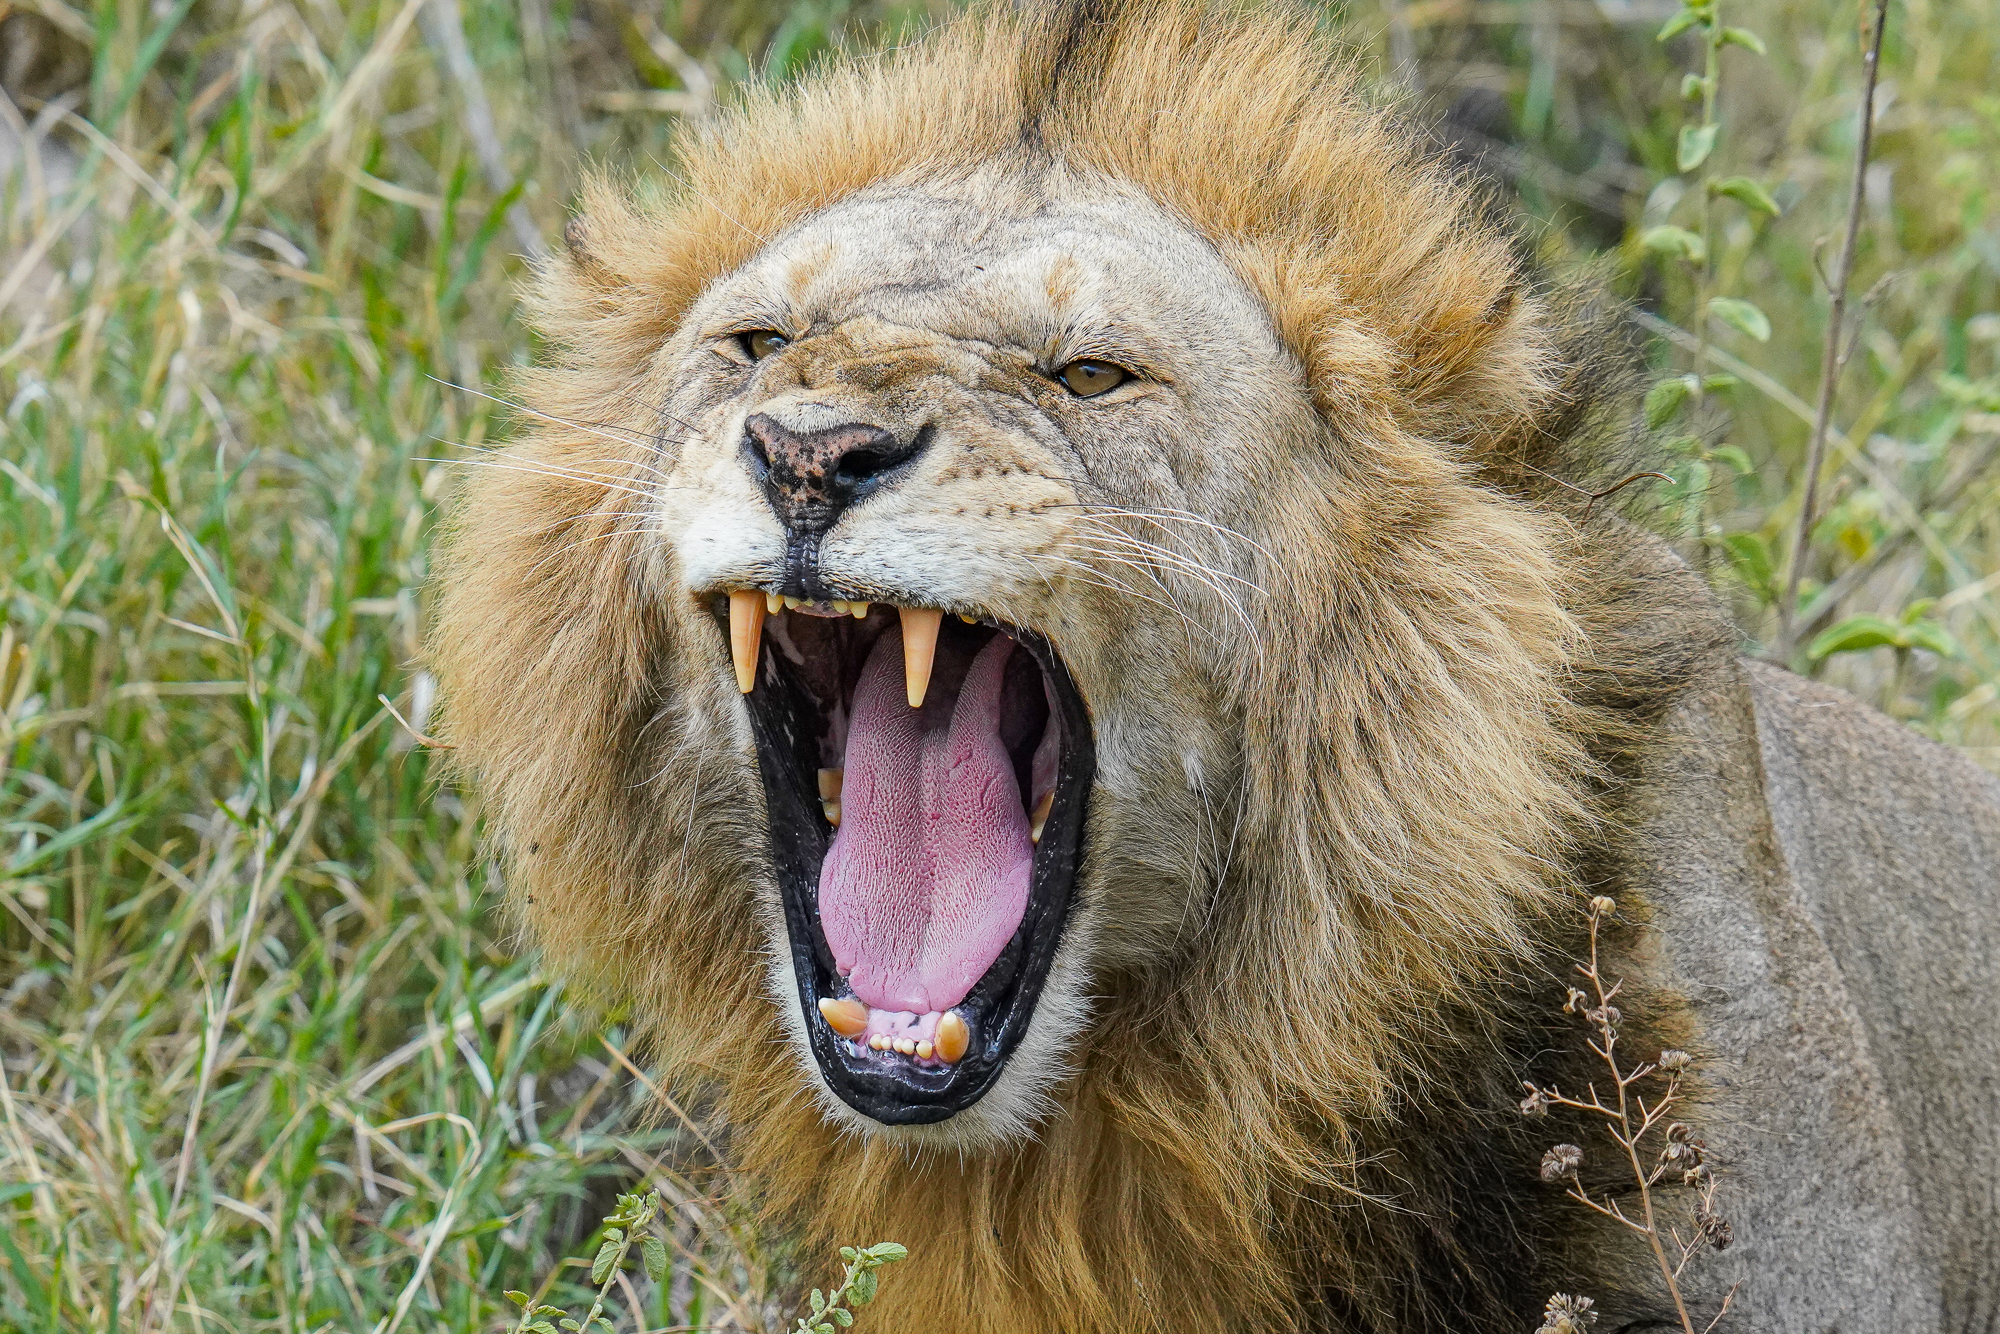
Take this lion photo:
This lion was fairly close to our vehicle, but to get a tight shot like this one, my focal length setting was 305.2mm.
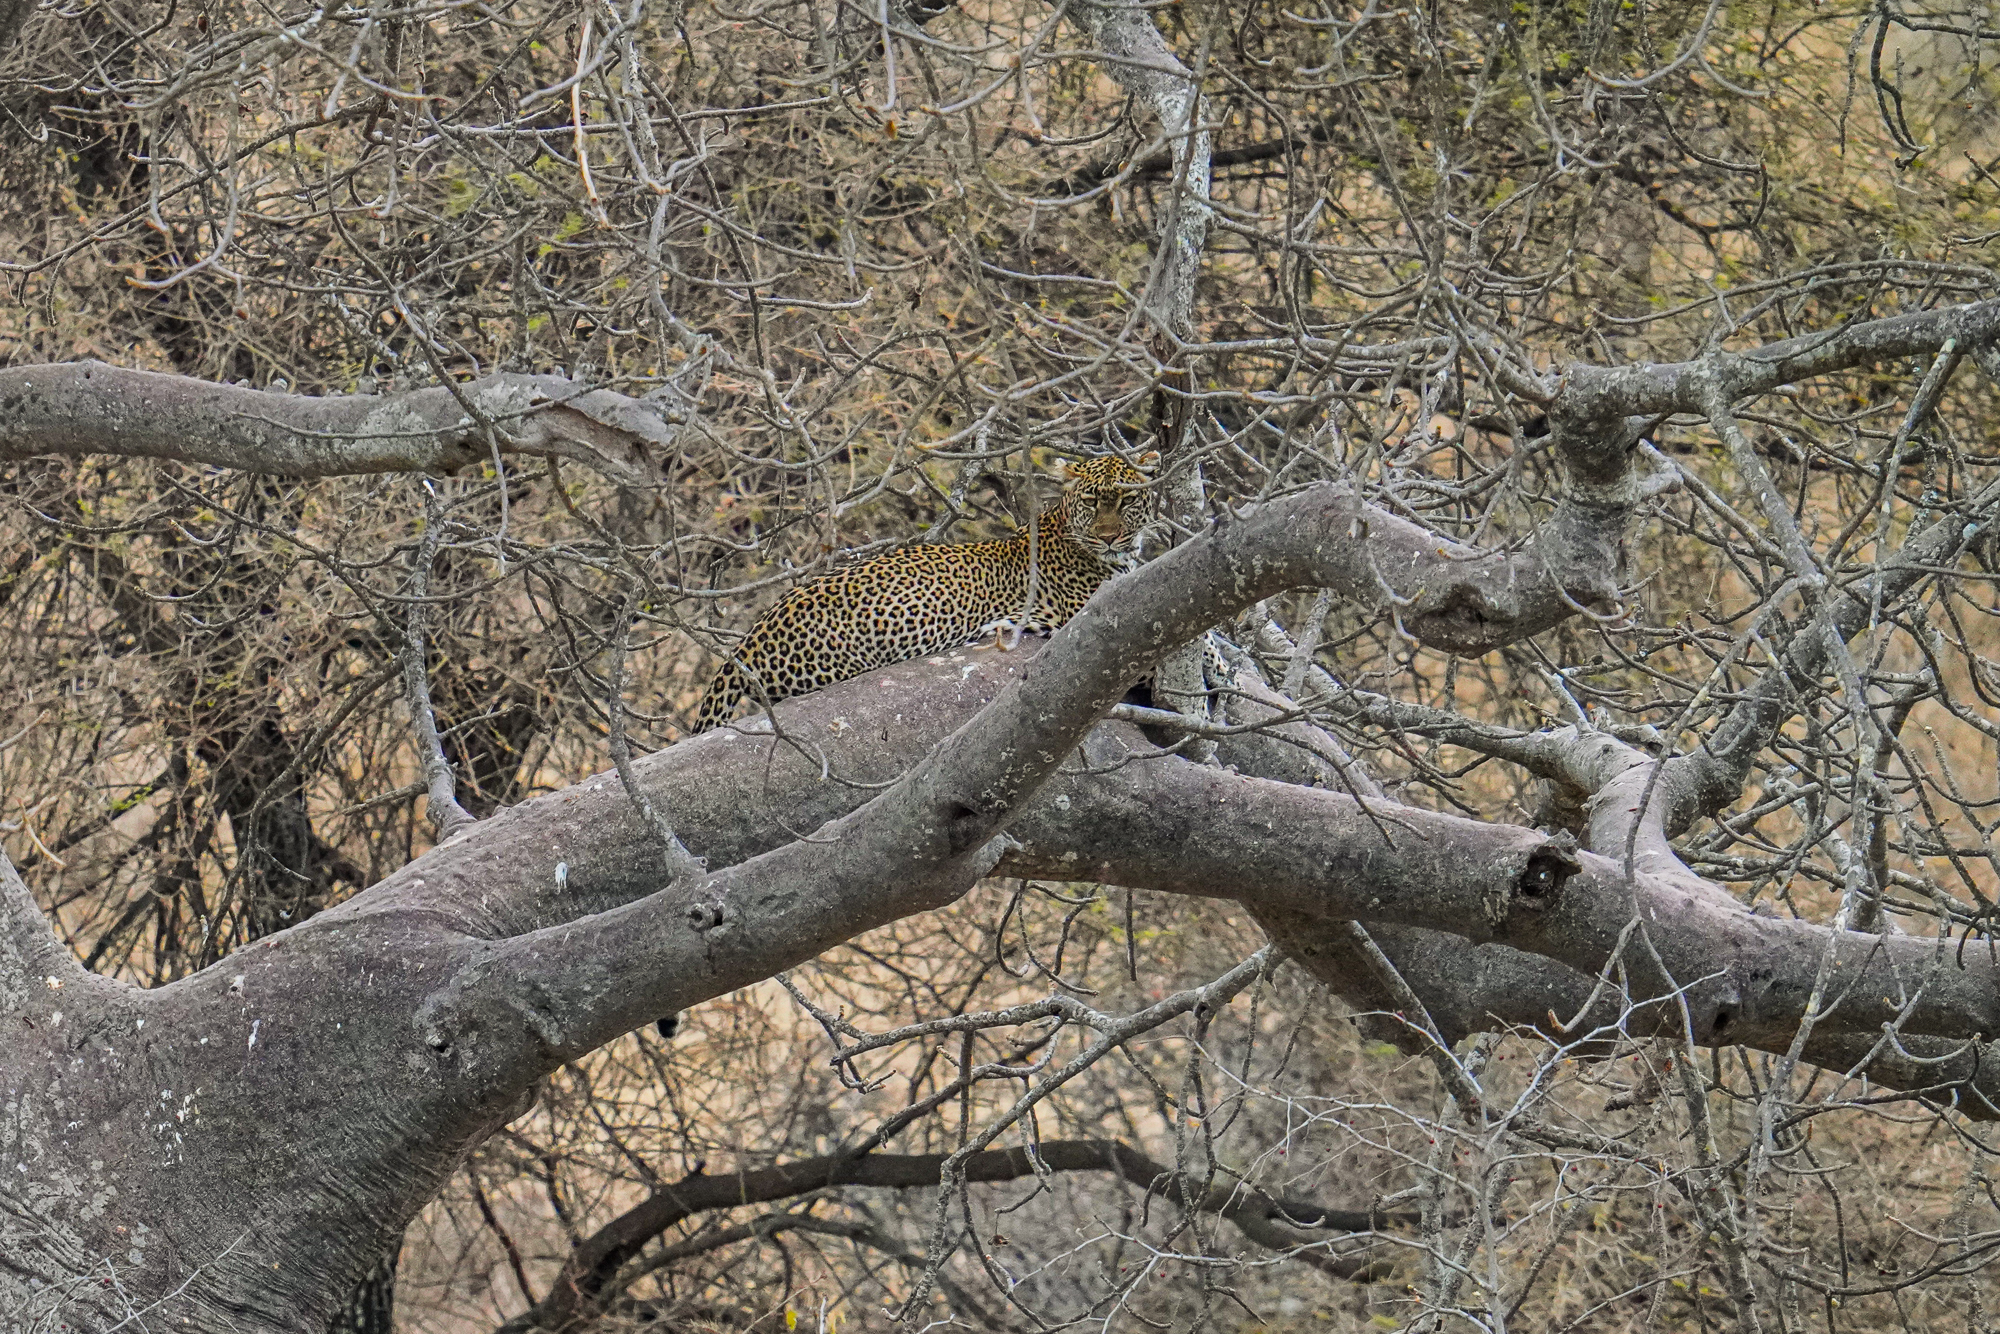
Or this leopard photo, as another example:
This scene was so far away that it was barely noticeable to the naked eye. It took looking through rather high-powered binoculars even to make out the details. In this one, I maxed my lens out and then cropped the image in by a factor of about 3-4x. Effectively, this was well over 1000mm in focal length if I had to estimate!
As such, upgrading to a telephoto lens for safari may be something to consider if your longest focal length is quite short (55mm, 100mm, etc.).
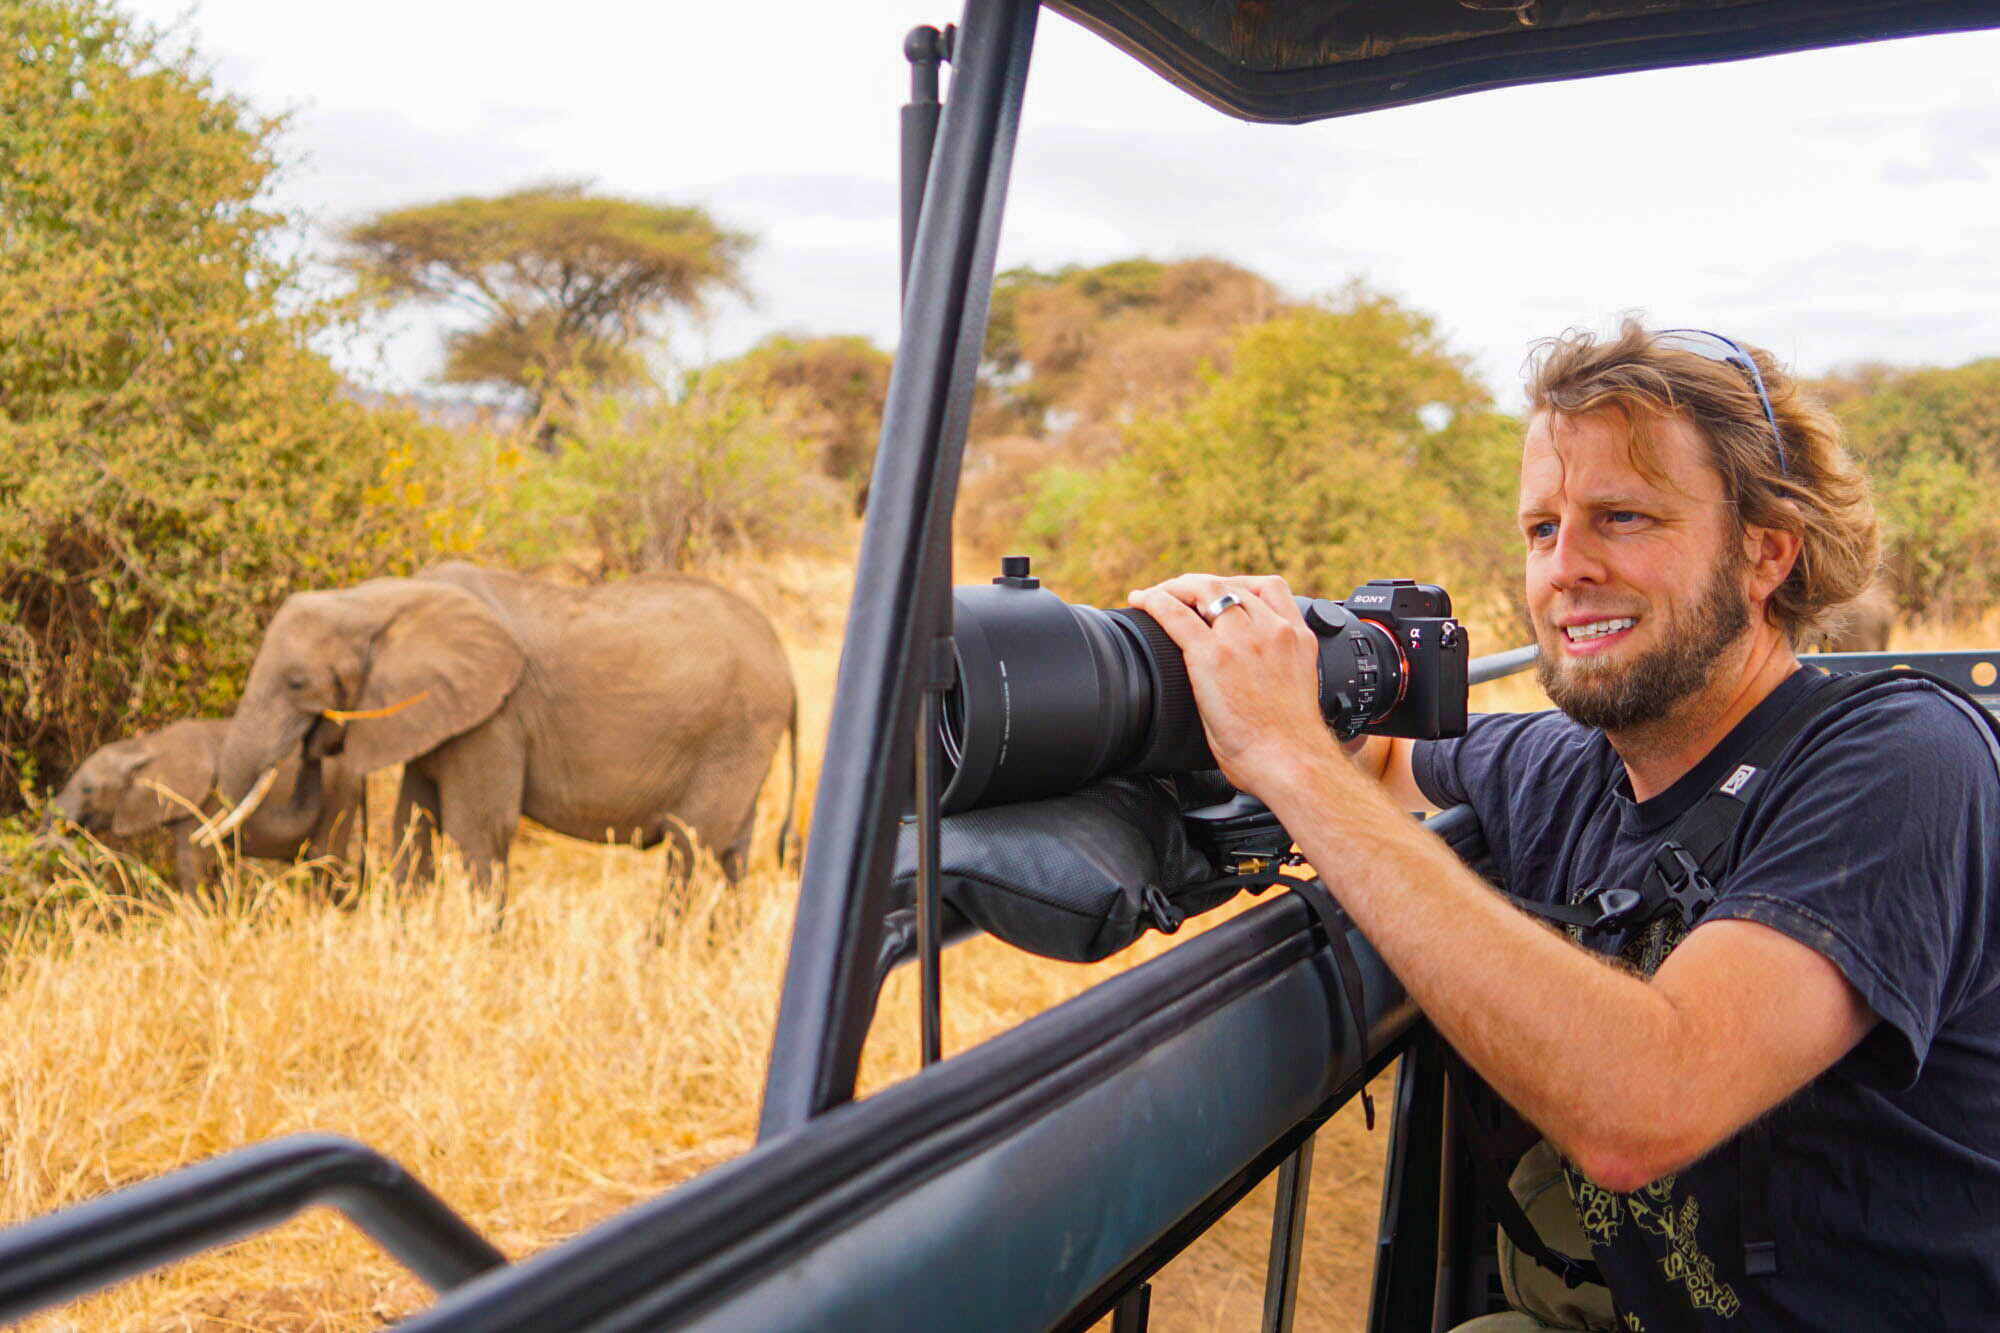
All this being said, when animals are close, you may also have the reverse problem in that a 150-600mm telephoto lens, like the one I used above, is too zoomed in for the shot. Thankfully, having a second camera with another lens, like a 55-200mm, or simply using your phone’s camera may do the trick.
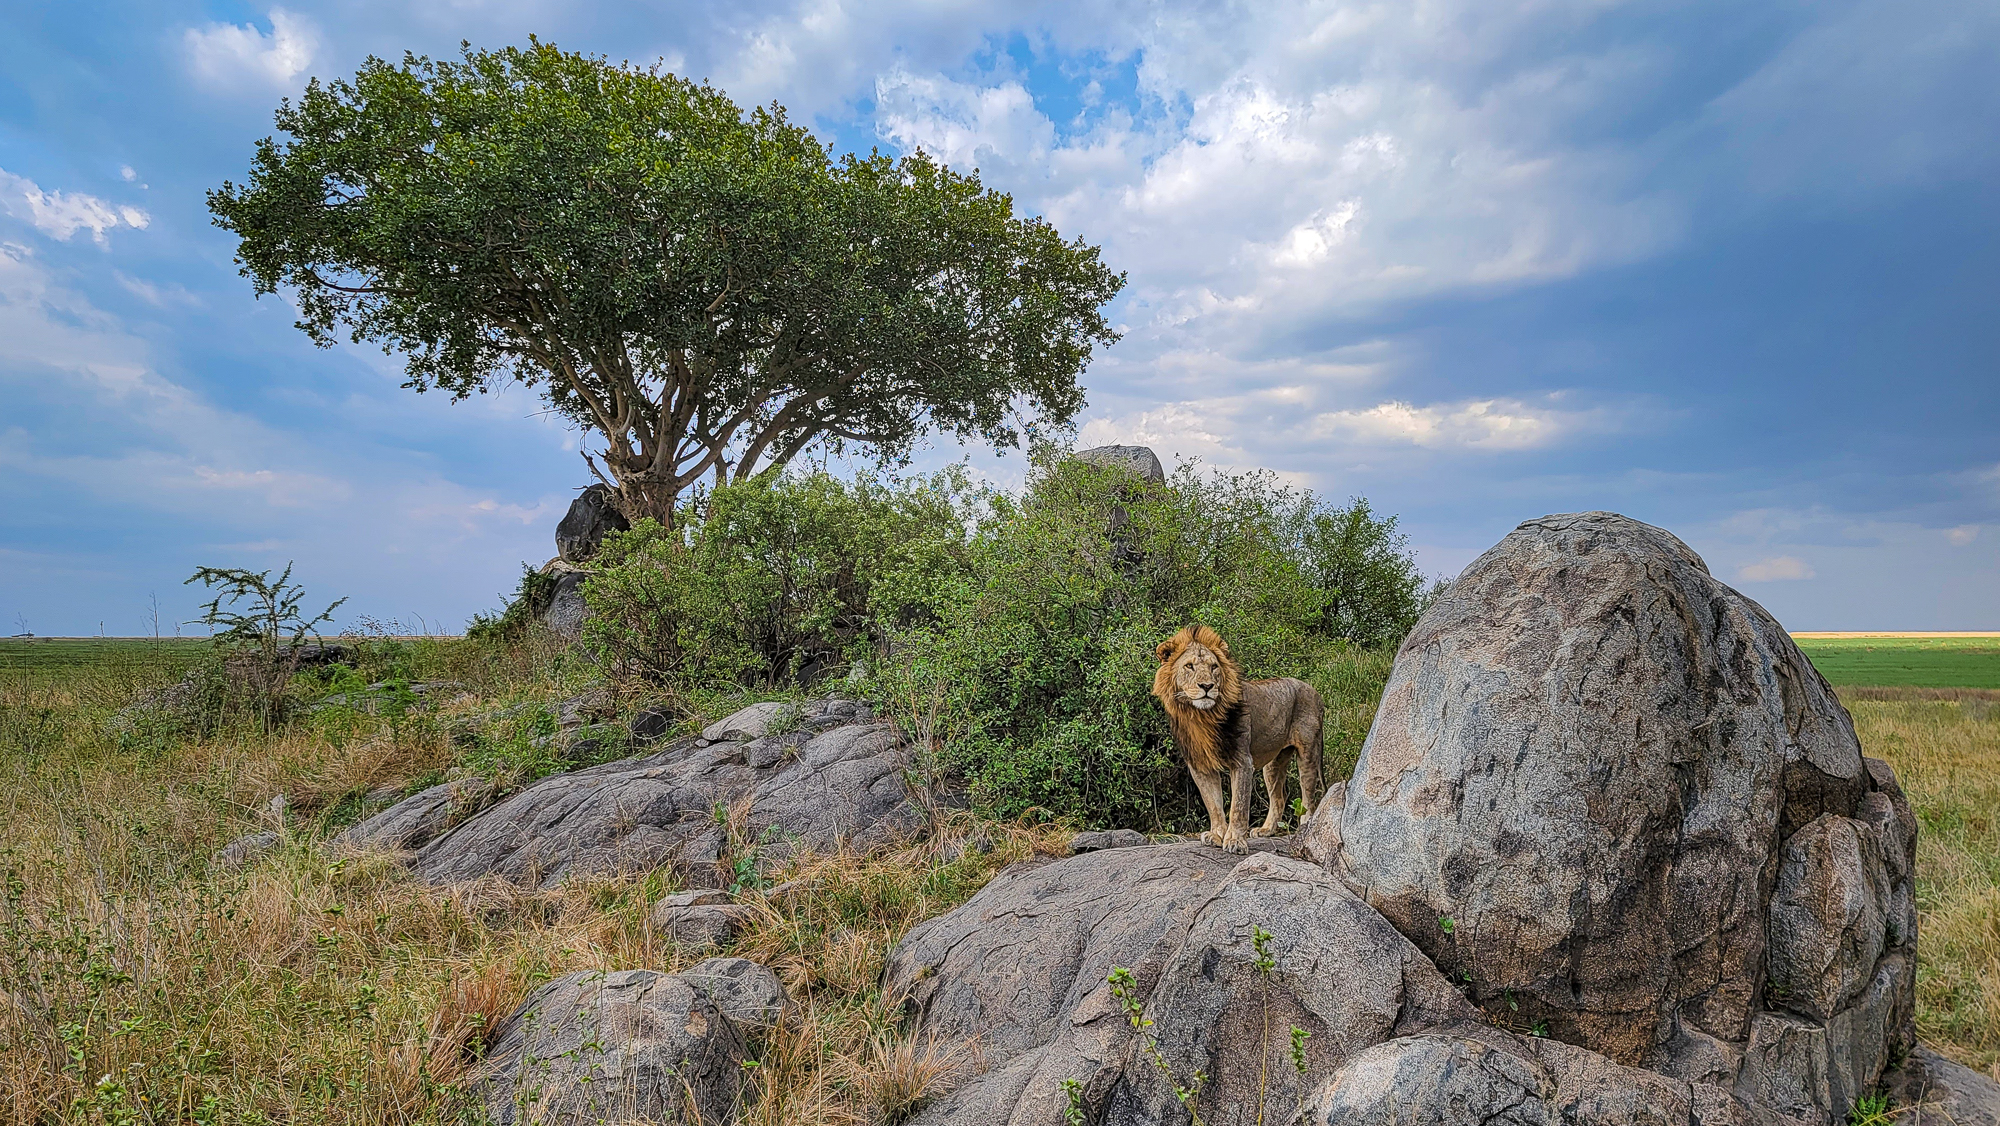
My favorite shot from Tanzania, after all, was taken by my Samsung Galaxy S21’s ultra-wide angle setting at just 6.7mm (0.6x magnification) and is the same lion from above but in a slightly different position relative to our vehicle:
As such, while it is easy for me to say that a larger zoom lens is better than not in most cases, every so often you’ll be surprised and find out that a wide angle is what does the trick.
- When shopping for camera lenses, be sure to confirm that the lens you are looking to buy is designed for your camera body, mount type, and sensor size. Remember that full-frame lenses may work on crop-sensor cameras if they have the same mount type, but not all crop-sensor lenses can work on full-frame cameras. We explain why that is in our article about using full-frame lenses on a crop sensor camera.
Fast Shutter Speeds Are a Must
Now that we’ve covered focal distance, the next most important thing you need to know about safari photography is movement.
Animals are living, breathing creatures that, unlike the rest of nature, have the capacity to move closer and further away from you- and some can move quite fast, too!
Capturing a lion standing on a rock or a leopard in a tree is fairly straightforward, particularly because they’re stationary, but when you are trying to get an action shot like wildebeest crossing the Mara River, you need to account for their speed when shooting.
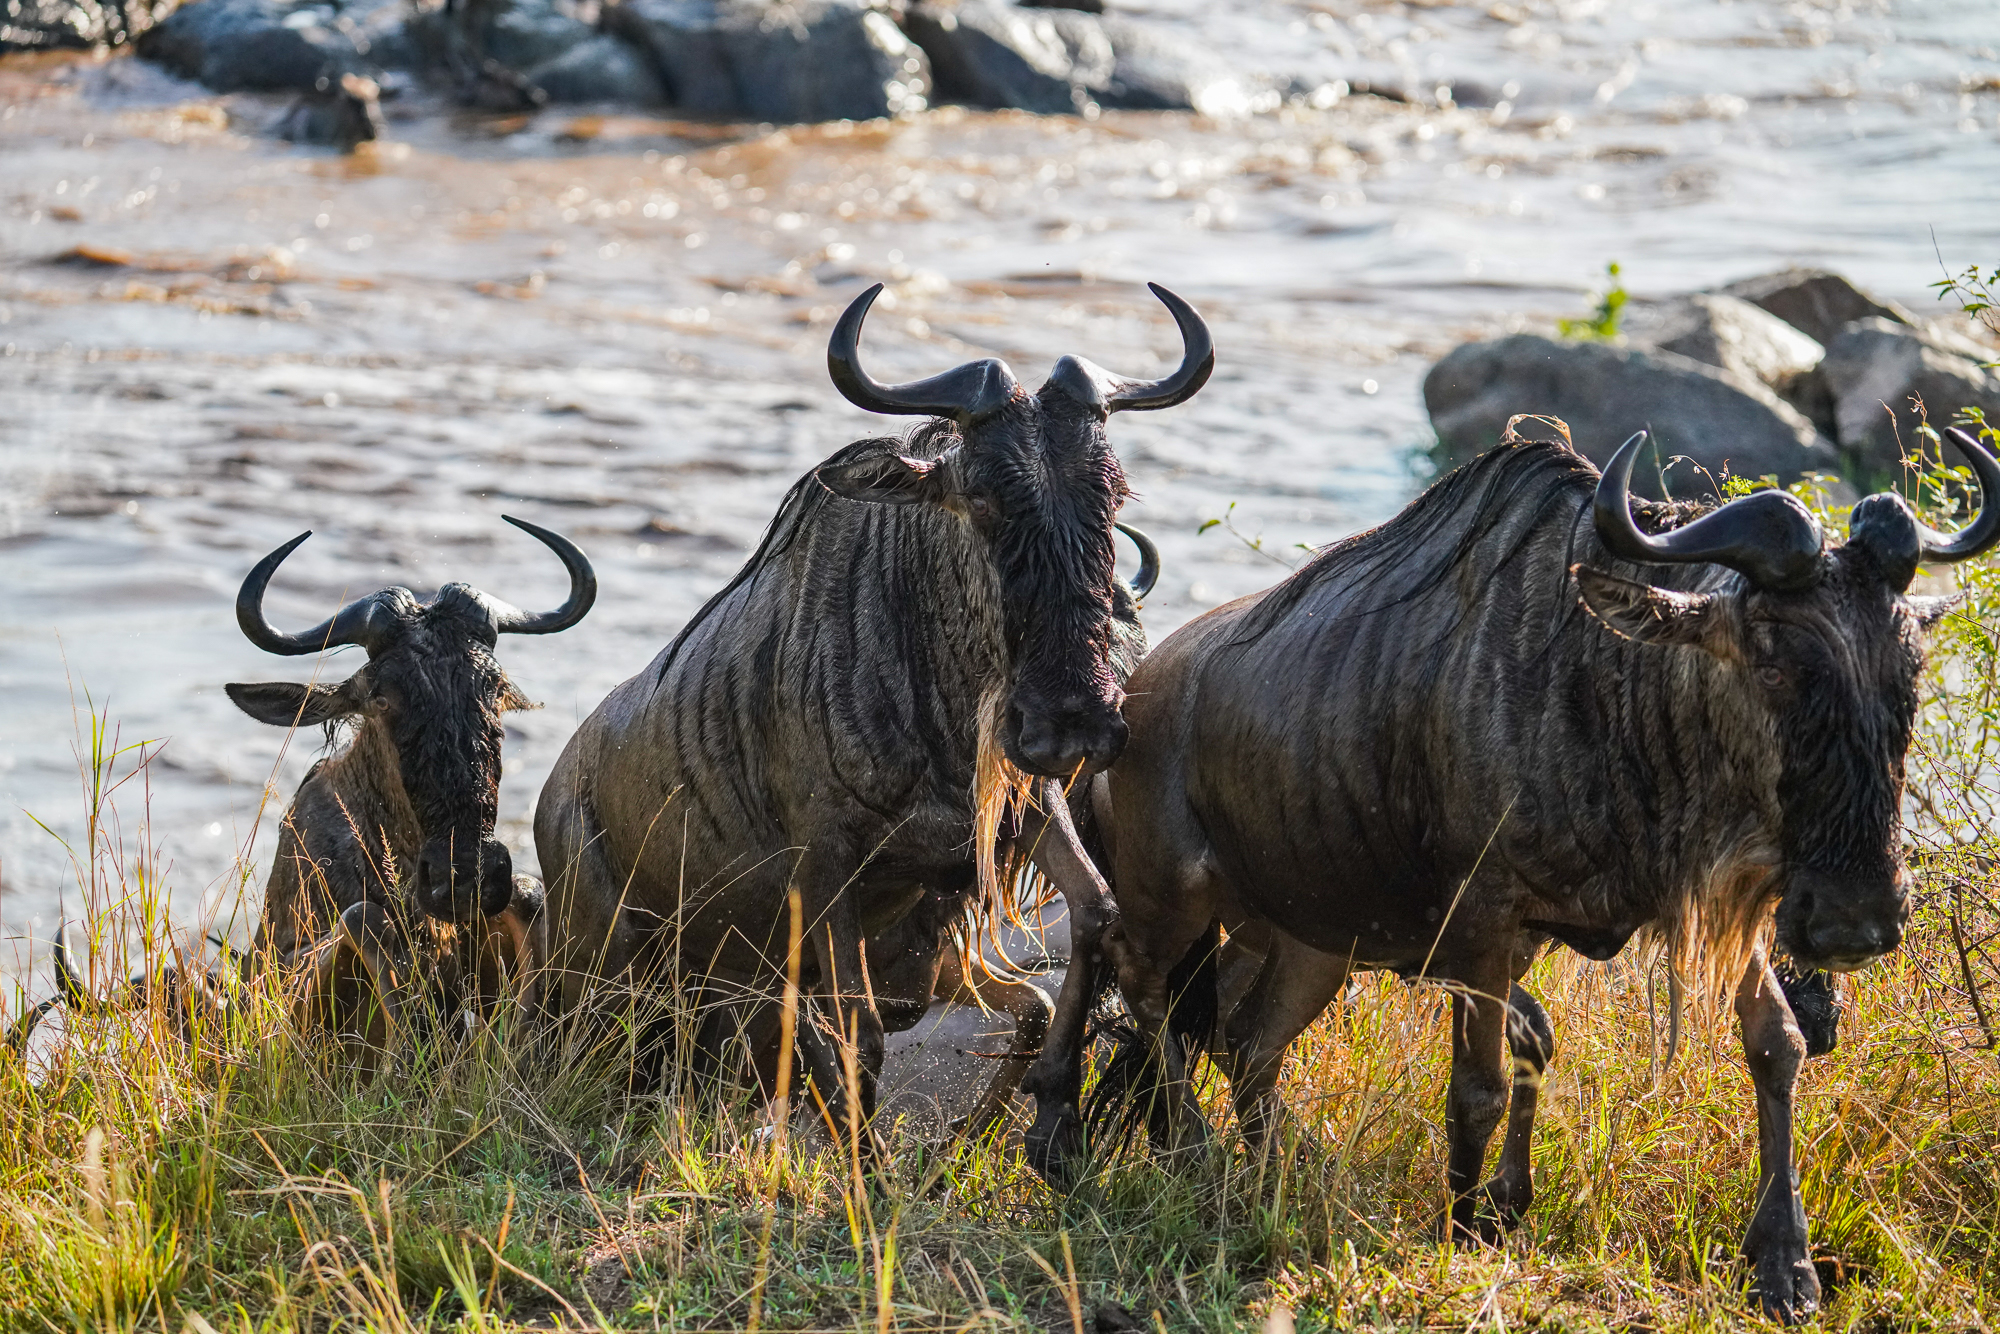
Take these wildebeest, for example:
These wildebeest ran as fast as possible to get out of the river to evade the crocodile and hippos in the water. Capturing these without any camera blur required shooting at about 1/3200s (I suspect that 1/2000s or faster would have worked, this just happened to be the speed I was shooting at to the point that you can see individual water droplets flying off them in the foreground).
Now, how can you do that in broad daylight with a camera lens that isn’t particularly fast (at 150mm, my lens was rated for f/5- admittedly somewhat slow but not bad for 150mm)? You will need to bump up your ISO sensitivity to compensate.
This setting adjusts your camera’s sensitivity to light, and when bumped higher, say, ISO 2000 instead of ISO 1000, you can get faster shooting speeds with the tradeoff being slightly worse resolution overall.
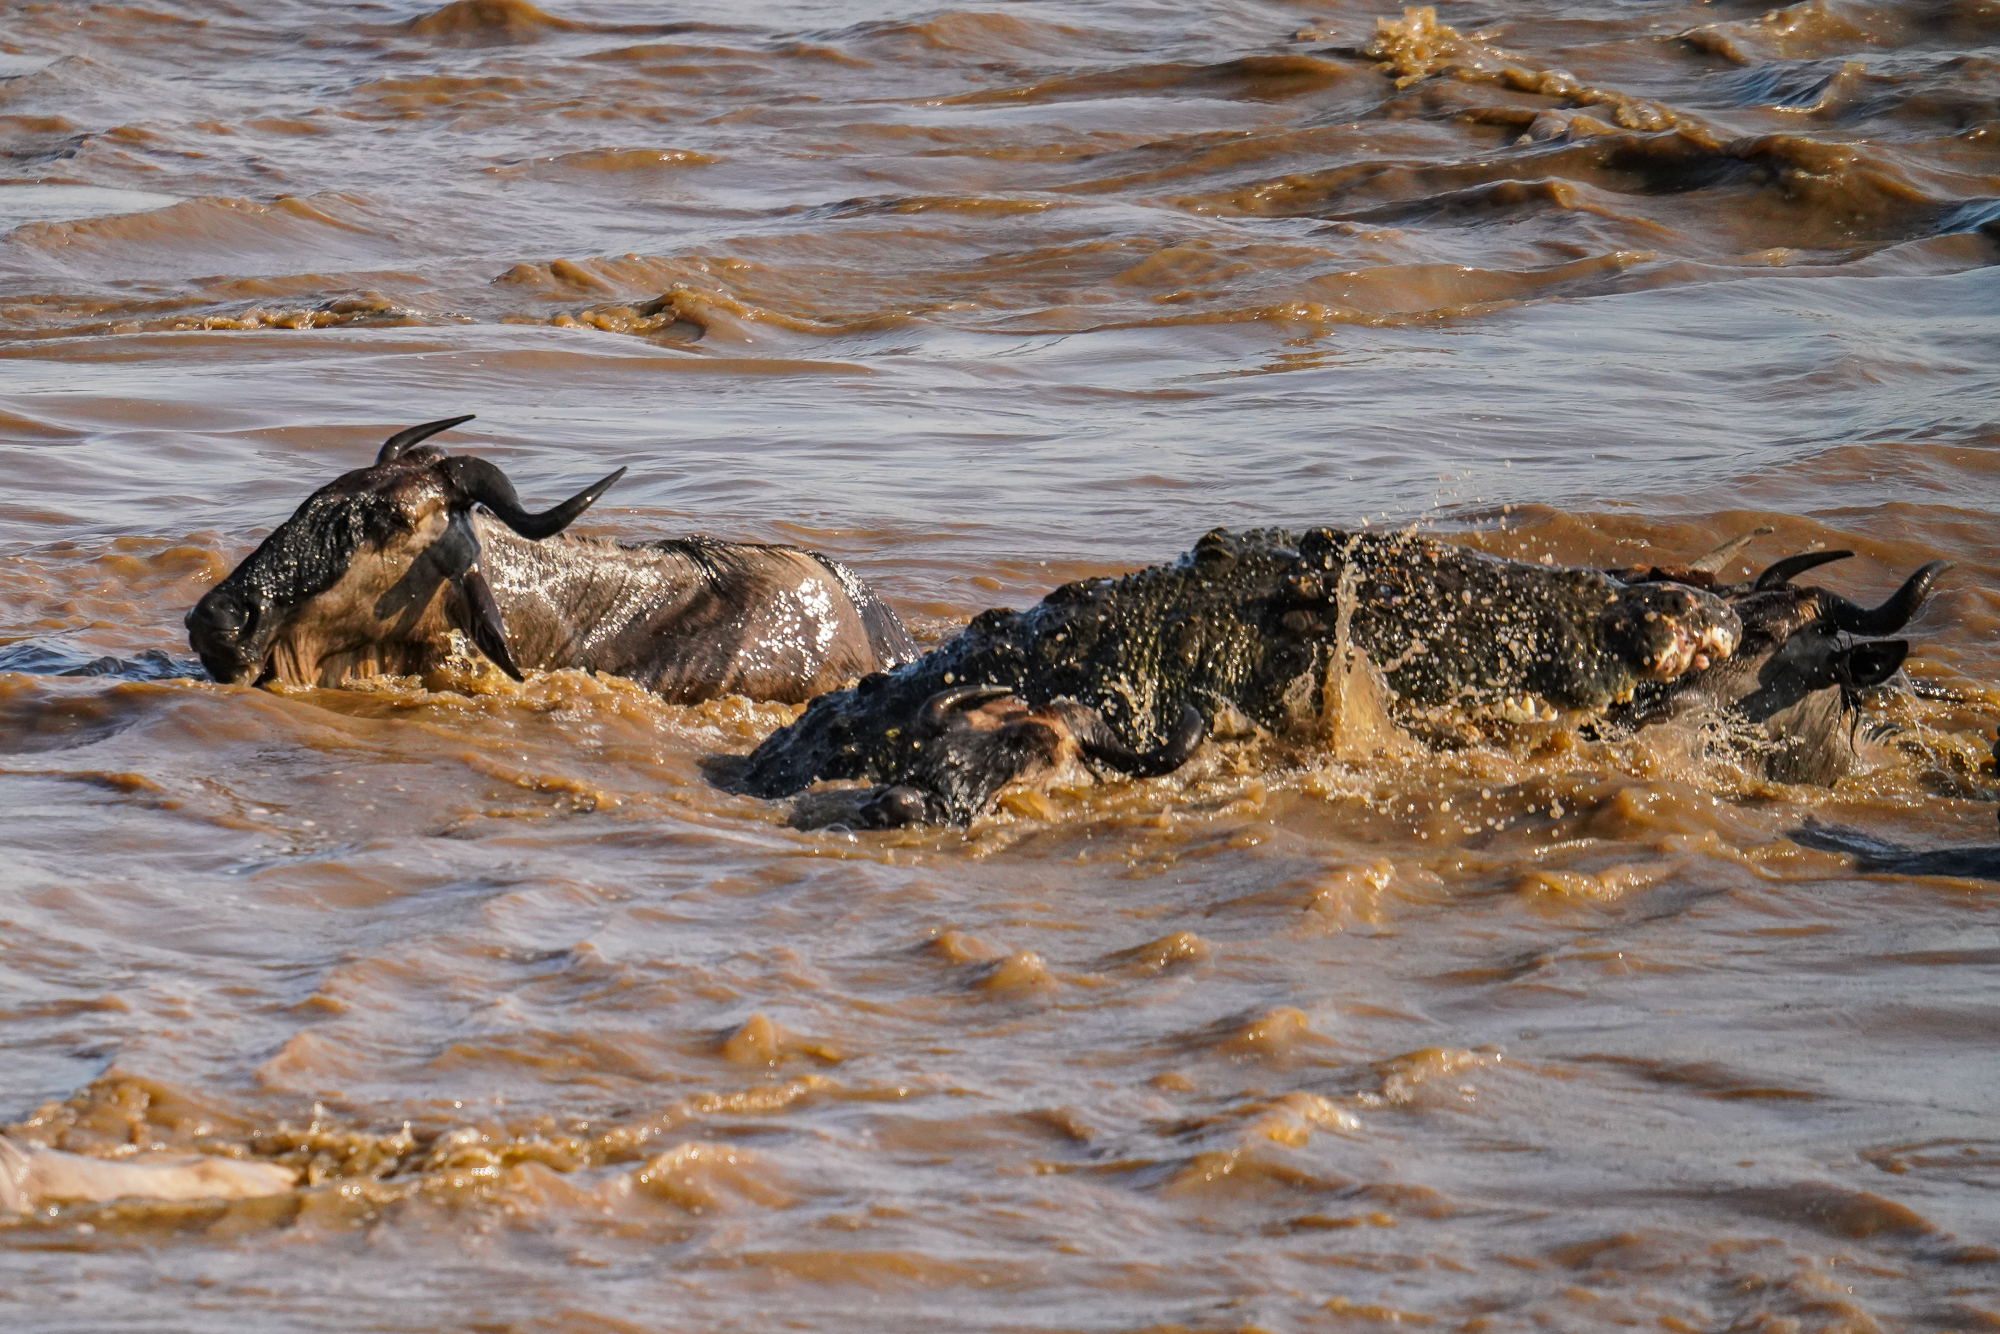
This crocodile attack from the same river scene is another good example. This one was shot at 1/4000s at 600mm f/6.3 (the fastest rating for my lens at this focal length) and ISO 2000. The ISO setting allowed my camera to be fast enough to capture this scene, as ISO 100 or 200 may have only allowed my camera to hit 1/500s if that (which simply would not have cut it for this shot).
The problem is that not all cameras are created equally concerning ISO settings.
A brand new, high-end, full-frame camera will, most likely, have the best sensitivity to light and the most advanced ISO adjustments for the sensor. My camera, the Sony a7R III, could achieve 1/4000s at an ISO 2000 for my lens and still look visibly great. My older, less powerful Sony a6000, on the other hand, may have required ISO 10000 for that same shot and would have likely looked quite grainy when you expand the image.
Since this has to do with your camera body (and local weather conditions) more than anything else, it is impossible to say whether ISO 2000, ISO 5000, ISO 10000, or something else entirely is the perfect setting. You must find a perfect setting for your camera and lens combination, which requires practice to understand fully. Maybe your body allows shots faster than 1/2000s at ISO 1000. Maybe it is at ISO 5000. Or maybe your camera can only do it when it hits a higher ISO setting and the image looks too grainy to be of any quality at all.
That is up to you to understand for your camera itself.
When it comes down to it, the point of understanding the relationship of ISO to the shutter speed is simply a matter of working out how to get the fastest shutter speeds for your camera and lens combination at large. If you can get to 1/2000s or faster, great. If not, I may be concerned about your lens, camera body, or both.
Before moving on, we would be remiss if we did not mention that shutter speed is also tied to the aperture rating of your lens. How much light a camera lets in is directly related to how fast your shutter speeds can be, and a lens rated f/2.8 will offer faster shutter speeds than one rated f/4.5, and one rated f/6 is going to be faster than one rated f/8. These are often linked to your focal length, as longer focal lengths tend to be more limited in aperture.
- Note: Lenses are often rated with aperture ranges, like f/4.5 – f/6.3, to indicate the maximum aperture at the shortest and longest focal lengths, respectively. So if you are buying a lens rated 55mm-200mm f/4.5-f/6.3, the 55mm focal length can shoot up to f/4.5 and the 200mm length can shoot up to f/6.3 Some lenses carry a fixed max aperture through all focal lengths, but can become quite expensive.
Ultimately, this all comes back to speed. If you have a lens rated for f/2.8 at its widest focal length, you may be able to get a shot at 1/4000s at a low ISO setting (say, 200). But if you have a large focal length, say 600mm at f/8, you may still have to crank that ISO considerably to get that same 1/4000s shot. When it is all said and done, this becomes a balancing act between your camera and lens specs.
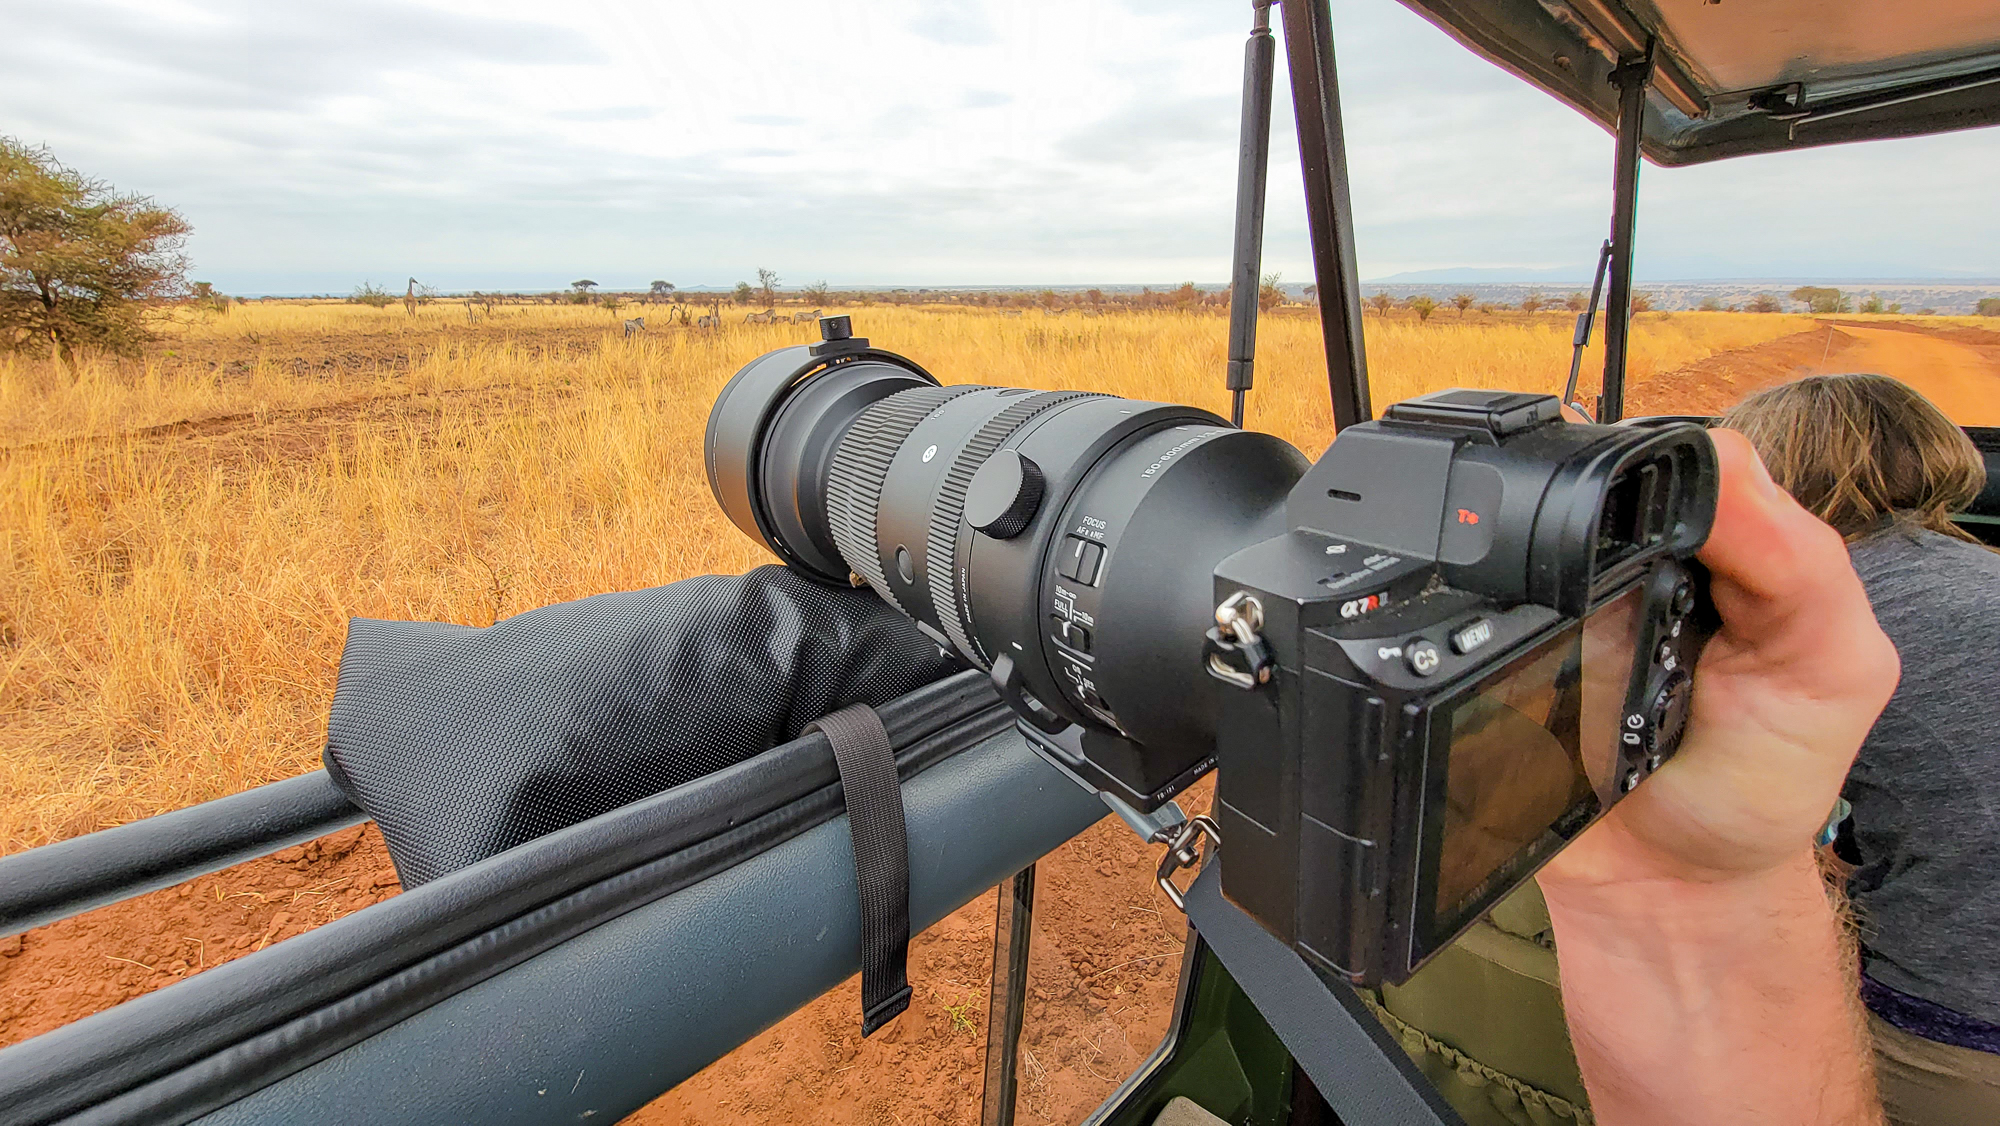
Now, you may say you want to buy the fastest-rated telephoto lens for safari and move on. This is a great idea, in theory at least, but they are also unrealistically expensive (think $10,000+ like this 400mm prime f/2.8). Even my Sigma 150-600mm f/5-6.3 Sports lens had a retail price of $1,400! As such, this is why we focus so much of this section on changing camera body settings like ISO over the lens speed itself.
At a certain point, you may have to take what you can get.
That being said, focal length is still the most important thing for taking great images on safari, to me at least. So if you are toying with the idea of taking a smaller lens (say, 55mm) or upgrading to a telephoto lens (either via buying, renting, or borrowing from a friend), I would almost always advocate for the latter. Whatever speeds you can afford are what you get, and then just work backward to adjust via your camera body to compensate!
- Note: For those who care about photo depth of field and blur, it is worth noting that you can still get a beautiful depth effect even at 600mm f/6.3. This is because bokeh and other optical effects are amplified at larger focal lengths. So while you may need f/2.8 for a 20mm shot, you may get a similar effect at 600mm f/6.3. As such, I don’t particularly worry about this one too much. A 600mm f/2.8 shot will, of course, look better than a 600mm f/6.3 shot, but if it costs >$10,000 more, well, I’ll take the f/6.3, thank you very much.
- Likewise, I almost always shoot in Aperture Priority mode to ensure that I am always at the fastest possible speed. Dial in the fastest aperture and let the camera do the rest!
Burst Shooting is Essential
There is another element of animal movement that you need to remember- much like with humans, a well-timed shot can evoke a sense of emotion.
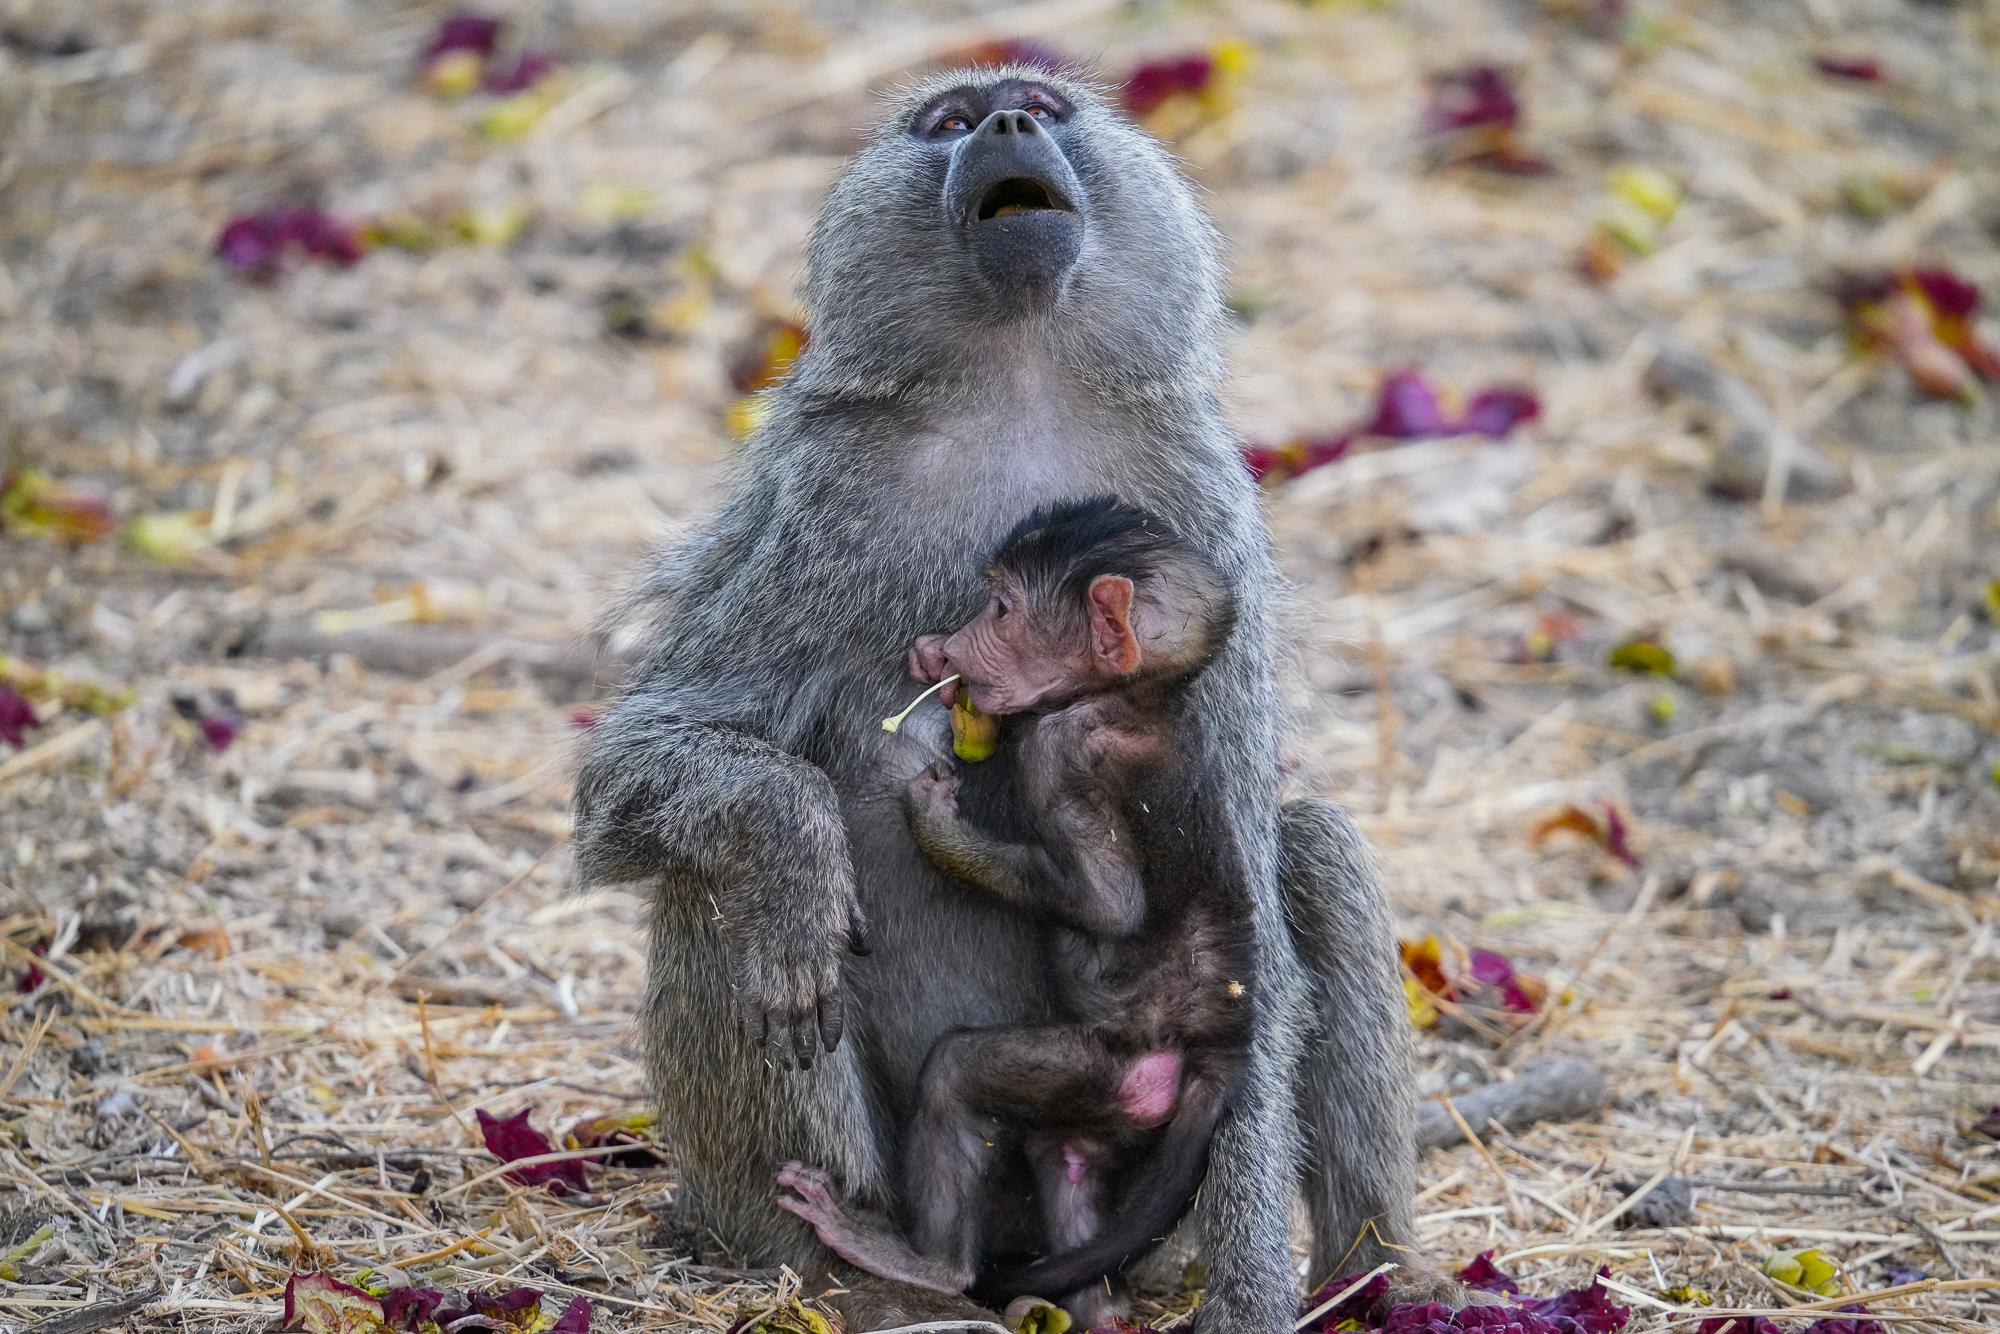
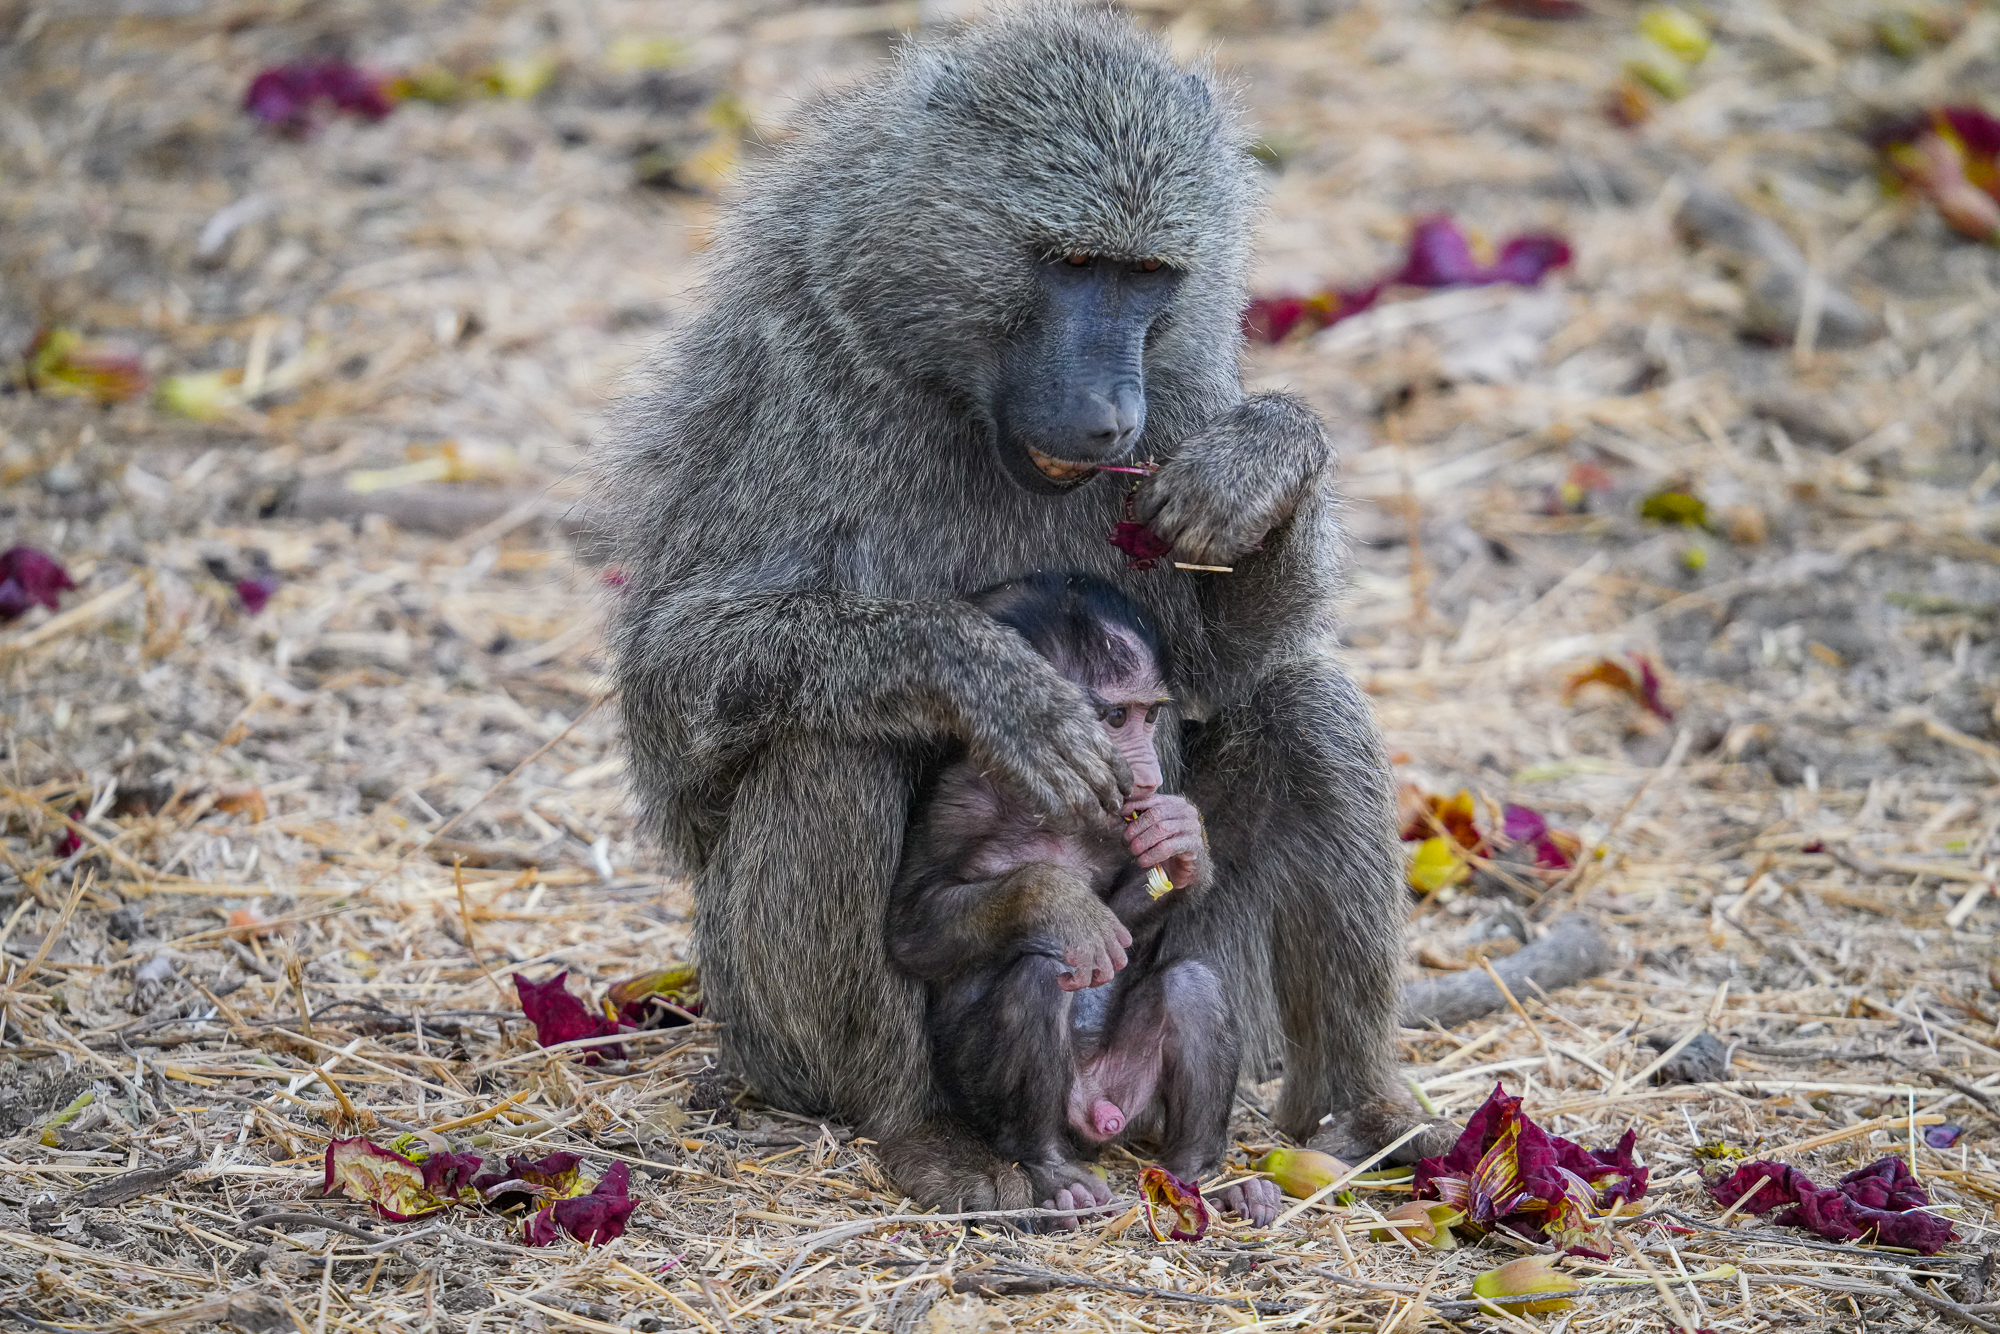
Take this shot, for example:
Pretty straightforward, right? A beautiful baby being held by its mother. Most photographers would love a shot like this of a baby focused so closely in the frame.
But what if we had better timing? Well, you get this:
Now we have some emotion of what looks to be a clearly exhausted mom sick to death of dealing with this [37 expletives deleted] kid.
Okay, fine, the caption is my own because we have no idea what is going through this mother’s mind, but the point here is simply that these two images were taken literally seconds apart. Replace this image with a chase or a kill, with the critical moment happening in a one or two-second window, and you are missing it- the same logic applies there as it does for these beauties shared above.
How was I able to get this shot? Setting my camera to burst mode (typically medium or high setting, pending how fast the scene in front of me could be) and using a memory card with a high write speed. The difference between taking one shot every 3-5 seconds and taking 3-5 shots every second can make or break a scene’s potential, and getting your camera settings dialed in at home can help you be prepared for when you are on the ground on safari.
Case in point, some of the fastest SD cards have a write speed of 300 MB/s. Before leaving for safari, I did not check what I owned and realized the fastest card in my camera kit was 140 MB/s. If your camera can push out large file-size images like mine can (think 40 MB or more!), you may exhaust your memory card’s write speed in a hurry- and that is exactly what I did, much to my horror.
It may sound like repetition here, but testing your camera with mock scenes at home, in a park, or at the zoo can go a long way to improving your photography when you are on the ground in Africa and far away from a camera store.
- Your camera body’s specs will inherently limit you here. Some cameras may tap out on burst mode at 1-2 FPS while another may get up to 10 FPS on the high end or more.
- It is also worth noting that some cameras can only achieve their highest FPS shooting in very specific modes. We cannot go into all of these modes here since every camera is different, but you will also want to check your preferred shooting modes and their max FPS rating before leaving on your trip- on-the-ground learning is never fun!
- When in doubt, being able to shoot at 3-5 FPS is often plenty. Yes, you’ll likely miss the optimal scene over those that can shoot closer to 10+ FPS, but that is part of the game. Anything is better than shooting one photo every few seconds, and that is the point.
- Finally, always have more memory cards on hand than you think you’ll need. You can always delete photos later, but you cannot go back and take more after the fact. I took enough SD cards to fill several terabytes worth of images.
Get Your Focus Settings Adjusted
If there is one camera setting that is always the bane of my existence when taking action shots on safari, it would be focusing.
I am a stickler for a perfectly focused shot. When you combine animal movement, possibly at high speeds, and varying distances relative to your vehicle, you have a number of scenarios that will make your camera work hard for that shot.
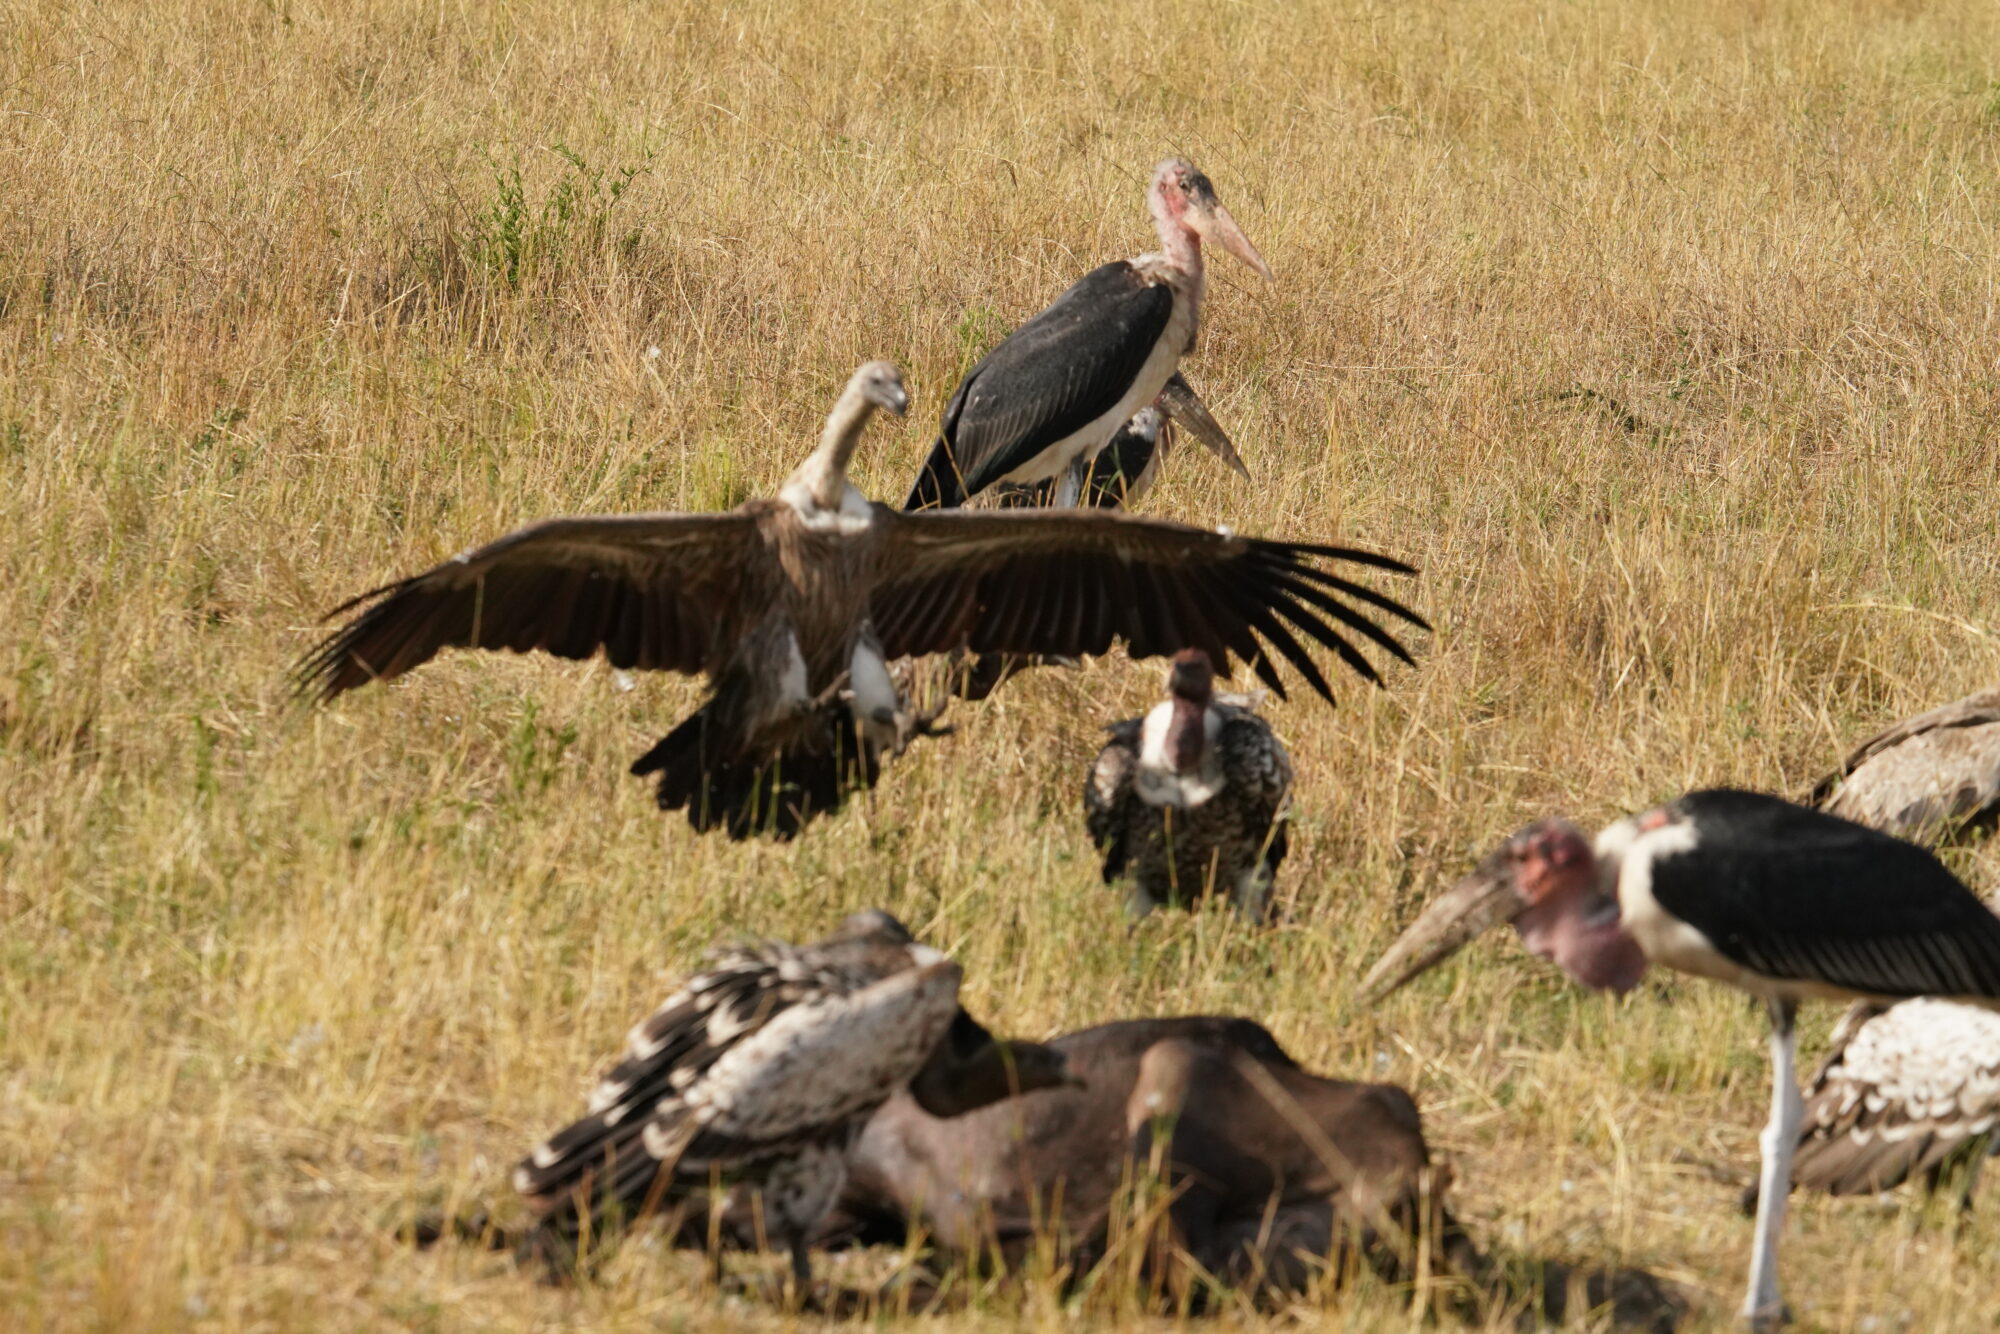
Even worse, when you think you get a shot in perfect focus, you may find that the absolute crispest depth of field may be on an animal’s ear or torso instead of its face or perhaps a blade of grass just behind the scene entirely. Oof!
An example of an image that I missed out on because of improper focus is:
Here, my camera focused on the grass in the background and completely didn’t recognize the scene taking place, movement and all. This plagues many a photo when on safari in Africa.
Sadly, there is really no one-size-fits-all answer to fix this problem.
Manual focus could be one option, but this requires adjusting for every depth of field scenario- so not so practical when an animal moves closer and further away from you at any speed faster than a snail’s pace.
Not shooting in the fastest aperture setting could be another (as I noted above that I do), as this allows for a larger field of vision to be shot in focus; however, the trade off here is that your shutter speeds will drop considerably and the balance of ISO, speed, and resolution comes into play again.
Some cameras offer autofocus that locks on eyes or faces, which could be an option, but this should be tested on an animal at home to see how it works in practice. The effectiveness on these can vary wildly by camera.
Other auto focus settings exist on most cameras, and their processing speed is inherently tied to your camera body itself. Conversely, you could also set your camera to focus on a specific point on your screen (center, adjustable location, etc.). Then the onus would be on you to ensure that the focus point always points straight at your intended subject. This tends to be the most popular recommendation as it is the easiest to control but still requires practice to ensure you are, of course, pointing at the right spot.
The trouble lies in that not all cameras are created equally here. A fixed focal point setting may work best for Camera A, but tracking focus may work quite well for Camera B. The only real way you can know is to try your camera at home at the zoo, with a moving pet, or birds outside, and see which setting may work best for you- remember that motion is a huge problem here.
In this case you may get the perfect shot, only to zoom in and find out that it is not, in fact, perfect, because your focal point was just a wee bit off. If that scene was a blink-and-you-miss-it moment, you just missed it.
Will this bother you as much as it does me? That is up to you to decide, but this one is a great annoyance that has impacted many safari photos for me. Much like other settings, the more you understand how your camera functions before you go, the better off you’ll be in that one-in-a-million-shot moment.
Use a Bean Bag for Stability
Finally, we come to stability. Using large telephoto lenses is a cumbersome process as a 600mm lens, when fully extended, can be quite large and unweildy.
The problem is that the larger the focal length you shoot at, the more pronounced camera movements become in your image. You may only move your camera body a few millimeters, but if you focus your camera on the subject hundreds of feet away at 600mm, you may end up many feet away due to that slight change. It is the same issue you get if you’ve ever used a telescope, tapped it slightly, and lost the scene- albeit on a much smaller scale of feet and not several galaxies away.
As such, keeping your lens stable in the moment is key.
We wrote an entire article about why you should use camera bean bags on safari, but the simple explanation here is that tripods, while good for stability for big camera lenses, don’t work well in a cramped safari vehicle. Bean bags, on the other hand, fit on the Jeep railing (if available), offer a nice contour for your lens for subtle movements, and can be adjusted between vehicle locations in a snap.
As subtlety is the key here, using a bean bag as a stabilizer helped get me some of the best shots possible on safari. (For the sticklers, having two, one for each side of the vehicle, could be a great option, too- moving them back and forth is an extra step that may eat precious seconds during a chase!)
When using any stabilization, be it a tripod or a beanbag, you may also want to test turning off your camera’s stabilization settings in the field as well.
The reason these settings exist is that, when you shoot free-hand, you are imparting minor movements into your camera that can be accounted for. When a camera is being used on a tripod or another fixed stability medium (like a bean bag), these movements may not exist. The stabilization features, however, are seeking out movement at all times and may contribute minor shakes as a result.
It is counterintuitive when you really think about it, but it is a problem all the same. Is this an issue when you’re shooting at 1/4000s? Perhaps not. Is this an issue if you are slowing down to 1/200, 1/30, or 1 sec+? It absolutely will be. Once again, testing this at home and seeing how your camera performs is key. (Just don’t forget to turn it back on when you switch back to freehand shots!)
When it comes down to it, these are a few of my favorite points to highlight when it comes to getting a great photo while on safari in Africa. That being said, this article should simply be treated as a starting point because every camera body, lens, and combination thereof is different. How all these components work in tandem is up for you to figure out, and this is best done well in advance of leaving for Africa in case you decide you want to upgrade your camera body, lens, memory card, or accessories.
So get your gear together, head to a local park or zoo, and get a ton of practice in so you are fully prepared when you are on the ground in Africa.
But, when in doubt, don’t forget to have your phone closeby as well, because you may end up like me and find that your absolute favorite shot of all time came from, of all things, a cell phone camera.
Do you have any tips for taking photos on safari in Africa? Comment below to share!
About Jeremy
About the Author: Jeremy is a full-time travel writer based in Pittsburgh and primary author of this site. He has been to 70+ countries on five continents and seeks out new food, adventure activities, and off-the-beaten-path experiences wherever he travels.
