Published by Jeremy. Last Updated on May 11, 2026.
Disclaimers: Our site uses demographic data, email opt-ins, display advertising, and affiliate links. Please check out our Terms and Conditions for more information. Listed prices and attraction details may have changed since our visit and initial publication.
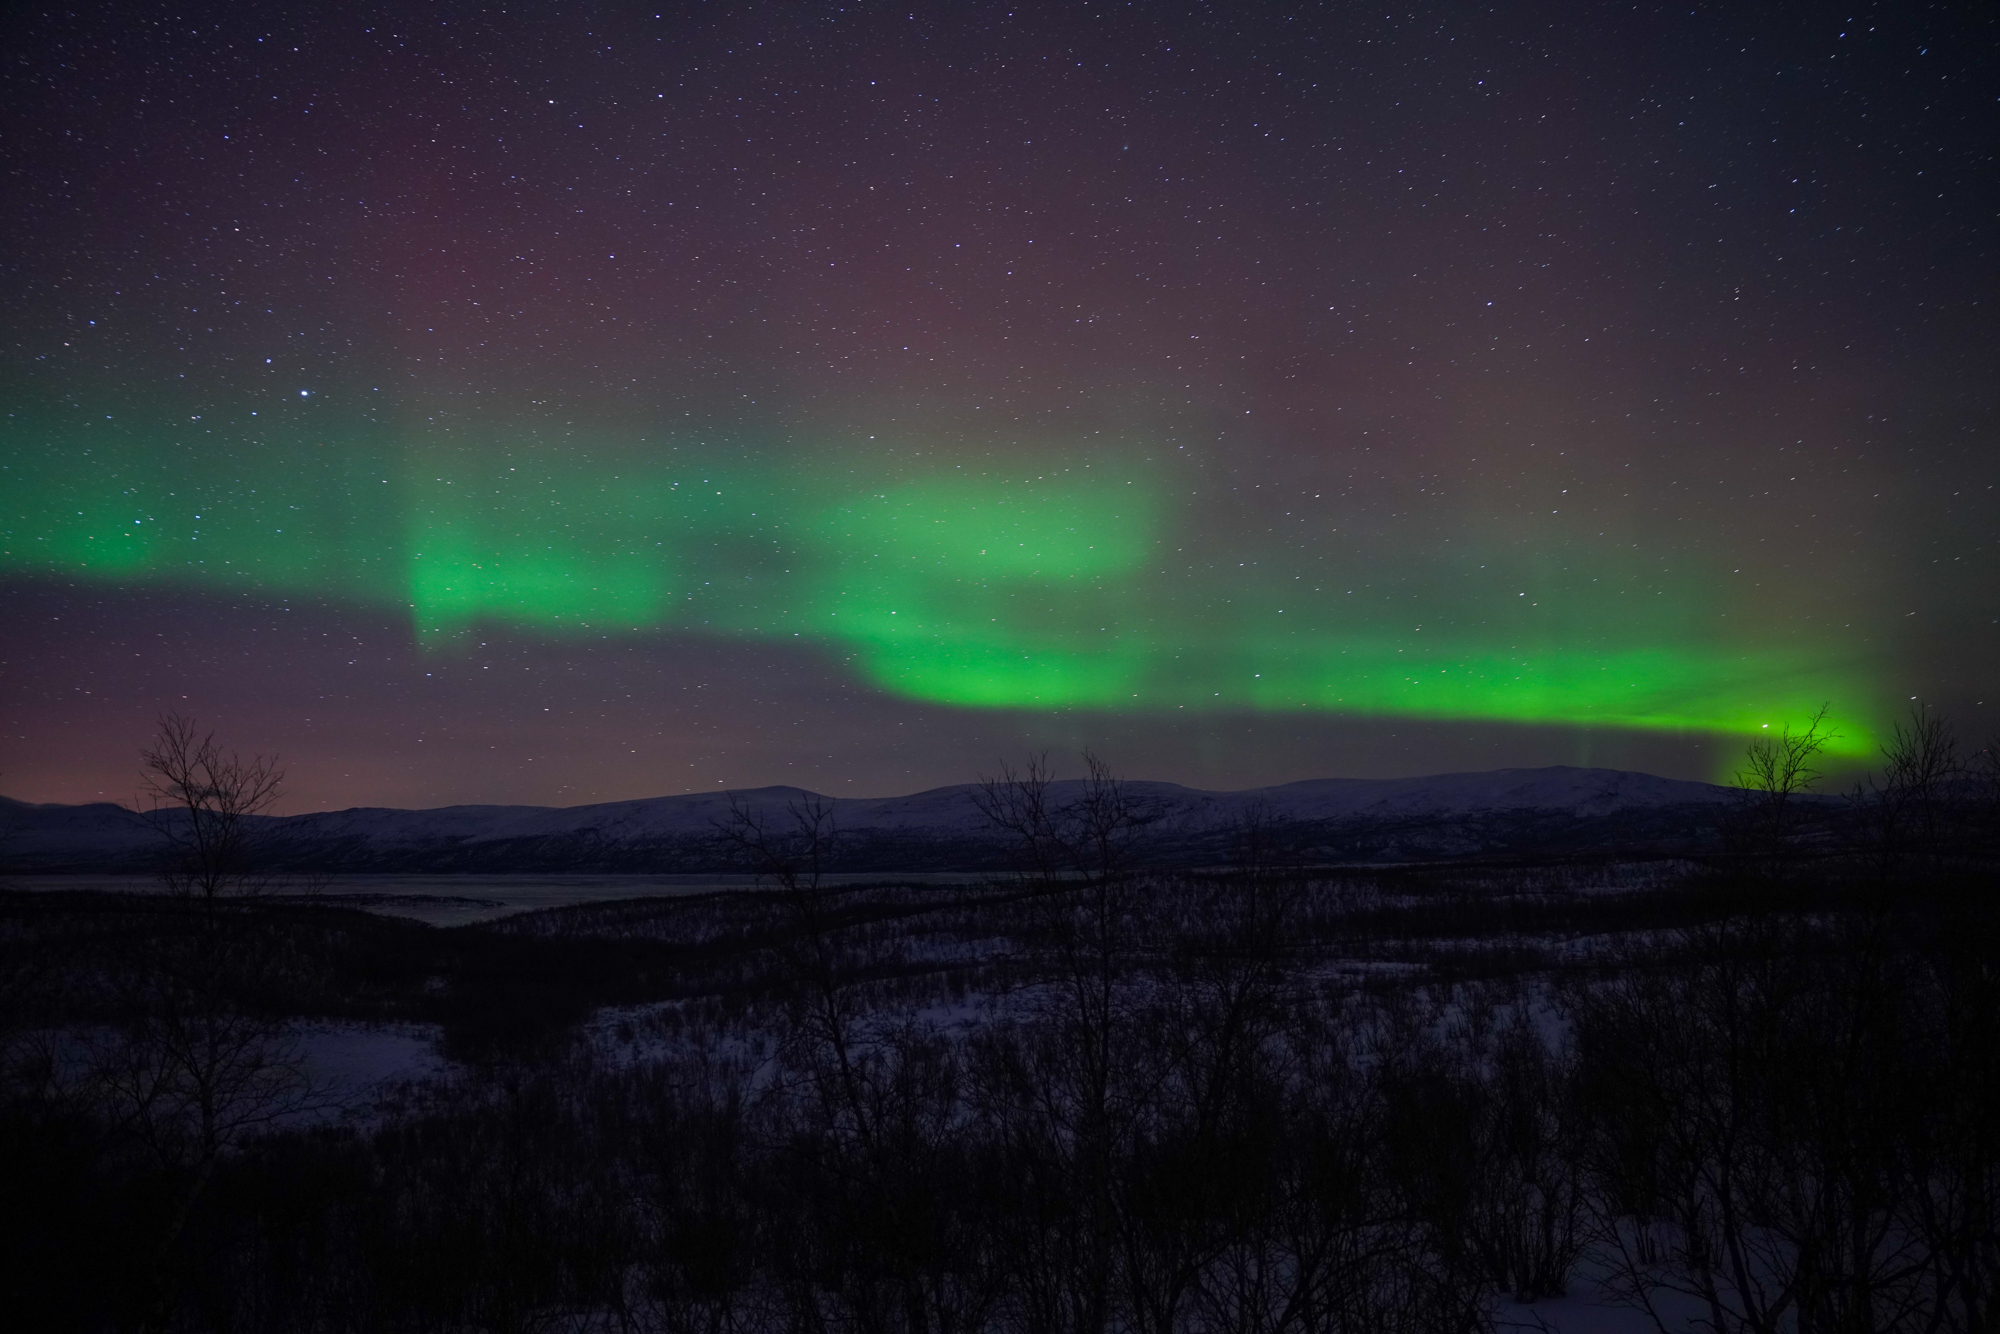
When we went to Kiruna, Sweden, deep in the Arctic Circle, to chase the northern lights, I knew I wanted to capture some (hopefully) stellar aurora photos.
I have had some experience in astrophotography when shooting photos of the stars deep in the desert, but combining that with often moving and fleeting aurora at much closer distances (than a nearby galaxy, at least) was a new challenge entirely.
After taking an aurora photography tour and practicing myself, I have some tips plus a few products you may want to buy that will help your aurora photography improve significantly!
📍 How to Photograph the Aurora Borealis – Quick Tips
- A Tripod and Slow Shutter Speeds: Be sure to take a camera and tripod with you to capture the northern lights- some phones are not able to capture clear images directly
- Long Shutter Speed, Fast Aperture: Some of the best photos of the aurora can be shot with 5-10 second shutter time and fast aperture speeds with lenses rated f/1.4, f/2.8, etc.; however, dancing columns may need faster speeds at ~1 second or less
- Your Camera Will Capture The Best Color: Many will see the aurora borealis as white to the naked eye- cameras capture far more colors than is often visually observed (that said, green, pink, and red can be visible- often in strong activity)
- Don’t Forget a Remote: Remember that it is often quite cold outside, so a remote control with timer or interval shooting can help with capturing photos while having gloves on
Looking to reserve an apartment in the Arctic Circle? Click here to book.
An Upfront Note About Aurora Colors

Before getting into the tips, it is worth pointing out that most aurora photography is embellished in the color department. Not in the way influencers use Photoshop to change their appearance outright (read: fake), but rather that to the naked eye the aurora borealis often does not look the way it does in photos.
A good percentage of northern lights sightings are not bright green, orange, or red to the eye but are, in fact, pure white. Think of the color of a cloud or the haze of the Milky Way and you won’t be too far off.
This is because the human eye has an incredibly hard time processing weak colors at night. The greens, reds, and other colors are there, but in many instances of weaker aurora displays, we simply cannot see them- we only see white. The aurora borealis has to be a fair bit stronger for us to see the colors to the naked eye, so if you see colors in real life, you may want to consider yourself quite fortunate.
Cameras do not have this problem as much because they can capture scenes with long exposure. Extra time in focus means more light to the camera, and more light to the camera means more colors become visible outright. This is why we can take vivid photos of the aurora borealis with a camera while only experiencing a white aurora to the naked eye.
So for our tips, you’ll want to be armed with a good tripod, prepare to take long exposure photos, and be ready for the fact that what ends up in your final photo will likely not be exactly the same as what you saw with your own eyes- at least in the color department.
- Oddly enough, our camera’s live view screen could pick up on color simply by pointing it at the aurora. That being said, taking a photo freehand will not produce that good of an image, so this little trick is often only good for determining if you’re looking at a weak aurora or a cloud as they can look somewhat similar until you take a photo outright.
Gear to Photograph the Northern Lights
This article references a number of pieces of camera gear you likely would need to photograph the aurora borealis. The most important ones are as follows:
- Camera – Any camera will do insofar as you can get into manual shooting for long exposure, changing ISO, manual focus, and more.
- Fast Camera Lens – If you are using an SLR or mirrorless with the ability to change lenses, a fast lens rated f/1.4 to f/2.8 is ideal.
- Tripod – To hold your camera steady during long exposures of 1/4 seconds.
- Remote Control – To take photos while keeping your hands in gloves or in a pocket in the extreme cold. Ensure the remote control you buy is rated for your camera.
- Extra Batteries – Camera batteries drain much faster in the cold. Ensure the batteries you buy are rated for your camera and/or remote control.
Use a Tripod for Stability

Before getting to camera settings outright, we should note that most all photos of the northern lights you see are taken with long shutter speeds 1s, 2s, 5s, 10s, or longer.
As such, unless you are lucky in that the aurora borealis is exceptionally intense to where you can take a decent photo freehand at 1/10 to 1/30 of a second (which we find horribly unlikely- although newer model phones have great night modes for okay-ish photos and timelapses), you are going to need to mount your camera on a sturdy tripod to ensure your camera doesn’t move during shooting.
Most all tripods will work fine assuming they are rated for your camera’s total weight; however, our guide pointed out that tripods with snaplocks on the legs are typically better in cold weather than those that screw to tighten due to temperature shock. That being said, I used a tripod with screw-tightening legs and did not have an issue. In either case, if you do not have a tripod, you’ll need to buy one before you go.
- To buy a tripod for your aurora lights photography, click here.
Faster Lenses are Preferable

For most photographers, you will also need a camera where you can adjust the shutter speeds to take upwards of 10 second shots. This can be done on most modern point-and-shoot cameras, professional cameras, and even some cellphones that have professional modes within the camera software (albeit getting into this mode is often cumbersome and would be a pain when gloveless in the cold, Arctic night).
However, for those with SLRs or mirrorless cameras where you can swap out lenses, you will have the best luck with a lens with a wide focal length (16mm, 20mm, etc.) that has a fast/large aperture such as f/1.4, f/1.6, and f/2.8.
The reasons for this are that wider focal lengths will capture a bigger area (great for capturing as much of a vista as possible), and for any given shutter speed (say, 5 seconds), faster apertures will let in more light relative to slower ones. A 5-second photo at f/1.4 will appear brighter than a 5-second photo at f/2.8 and so on. So for those with slower lenses (smaller aperture), say, f/4.5, you may need a much longer exposure to get the shot, and that could pose a bit of an issue with faster dancing aurora.
- Yes, it is counterintuitive to say “large aperture” and show a small f-stop number (in absolute terms), but this is how the notation works. The “smaller” the displayed number, like f/1.4, the larger the aperture and therefore the more light the lens will let in at any given shutter speed.
Another reason why this is important is that most cameras without a Bulb Mode feature cap out shutter speeds at 30 seconds. So if you have a slow lens whose fastest aperture isn’t very large (say, f/4.5), your 30-second shot could still appear quite dark in some settings where a faster lens (say, f/2.8) may look like you are viewing a dark scene as if the sun were up!
Ultimately, having a faster lens gives you more control over how a scene looks in near complete darkness, and depending on your base camera model and overall ability to change settings could drastically impact the final photo outright. So if you are looking to upgrade to a faster lens, picking up a lens with a max aperture rating of f/1.4 to f/2.8 could be a good idea if you do not have one already.
But, as with everything, you should always test out taking a long exposure at home and see how your camera performs in low light on a tripod at varying conditions.
For full reference, all photos featured within this article were taken on a Sony A7RIII full-frame mirrorless camera with a Sigma 24-70 mm f/2.8 fixed aperture lens (f/2.8 held through the entire focal length).
- To pick up a lens for aurora photography, click here.
Switch to Manual Mode for Full Control

So, what settings “work” for the aurora? This one will vary on several conditions including the intensity of the aurora, if there is a scene in the foreground you’re focusing on, your camera’s specs, lens rating per the above, and more.
To have the most control to balance the potential combination issues, you should switch your camera into full manual mode. I normally shoot in aperture priority mode as a matter of personal preference, but that is not good enough for astrophotography so full manual mode it is.
This will allow you to set your aperture to its largest size (remember it is the lowest number for your lens, such as f/1.4 or f/2.8), shutter speed (1-10 seconds pending brightness- if not slower), ISO for light sensitivity (2500 is a good start depending on camera model but you may have to go higher), manual focus, timer to minimize shakes (2 seconds is good for most lenses under 100mm, 5 to 10 seconds if your lens is 100mm or larger), and more.
If your scene has a brighter object in the immediate foreground to focus on, such as a tree, lake, or another highlight, you may be able to shoot with focus settings in auto. However, in very low light cameras tend to struggle with focusing on any object no matter where it is located. Even with a tree just a few feet away from me, my professional camera couldn’t keep up, so I had to work in manual focus mode, too and often would focus on a tree, mountain, or even the stars.
This one is perhaps the hardest setting to master as you’ll find it is a bit of a trial-and-error process to get your scene in the best focus. If you are not used to the sensitivities of manual mode and/or manual focus, be sure to test these in low light before leaving to get a feel for your camera’s behavior. Trying to get the hang of manual focus when it is -20°F out is a hard lesson that I do not recommend (yes, this was me)!
Likewise, you may want to keep in mind that different aurora conditions could require different settings. For a faint, slow-moving aurora, I tend to shoot at around 4-5 seconds, f/2.8, ISO 2500. For aurora that was dancing and moving somewhat quickly, a slower shutter speed may not capture the columns as well. Here, I’d go 0.3 to 1 second, f/2.8, ISO 5000-8000.
More or less, the slower the aurora is moving, the slower the shutter speed and lower ISO you can use. The faster the aurora is moving, increase your shutter speed and compensate with a higher ISO. The exact settings will likely vary for your camera; however, and I’ll note that my full frame camera and lens is exceptional in low light. You’ll just have to use a bit of trial and error from there to dial in your ideal preferences.
From there, you may want to turn on Raw + Jpeg mode if your camera allows as Raw files give you greater editing control, particularly around lighting. We typically like to have both just because I am more used to saving files in Jpeg for quick sharing as well. Although it is worth noting that the file size can be huge here so make sure you have a large memory card with fast write speeds, too!
Finally, any small movement to your camera can cause you to lose focus in manual mode. Once you’ve dialed in your settings, got a crisp shot, and are happy with the composition, try not to move your camera at all as long as the aurora is in the field of vision. Every time you move your camera, even just an inch or two, you’ll have to redo your manual focus settings which takes time and takes your attention away from enjoying the show (and capturing it, of course).
- To buy a larger memory card, click here.
Turn Off Shutter Stabilization
One more camera setting you may want to turn off is any image stabilization or “steady shot” modes your camera and/or lens may have. This is good practice whenever you take photos on a tripod for a rather unusual reason.
Typically, these settings within your camera are exceptional at stabilizing any subtle movements you may introduce shooting freehand. No matter how steady our hands are, they still move to an incredibly small degree. On a tripod, these subtle movements should be nonexistent, but because of how the programs are designed the camera expects it, and in the process of monitoring for a shake, creates some itself (yes, this is counterintuitive but it is what it is).
So be sure to turn off image stabilization when shooting on a tripod. But note pending your camera’s manufacturer it may come with a different name. This may be on the camera body, lens, or both!
- Like the other setting changes mentioned above, always practice shooting in a mock scenario at home to make sure your photos turn out to your liking sans aurora.
- This may also be something that varies from camera model to camera model. I honestly don’t notice as much of a difference with my Sony A7RIII than I did with my Sony a6000. But, when in doubt, test before you leave.
A Remote Control Helps for Those Who Get Cold

As mentioned above, shooting in the cold is hard on the hands. Cold nights plus the need for dexterity typically means using thin gloves (if any gloves at all), which is often at odds with the frigid weather that comes with being in or near the Arctic at night during aurora events.
If your camera allows for a remote control, especially a wireless remote control, this can minimize risk to your hands as you instead either click a button or set on interval mode to take recurring images- all with the remote in the comfort of a pocket (and with gloves on!).
Yes, you will need to get your settings dialed in ahead of time (much like others mentioned in this guide). And yes, this means still playing with your camera with your hands. But once you dial your settings in you can throw a hand warmer in your glove and shoot from the comfort of a pocket for a good number of shots. I let my camera go on interval shooting and stood back, watched the aurora, and only made minor changes as needed.
Win!
- To pick up a remote control for your camera, click here. Please verify remote compatibilities with your camera model before purchasing.
Cold Weather Concerns for Your Camera
It is also worth noting that electronics do not do well in cold weather. Many photographers will note strange things that happen when their cameras hit -10, -20, or -30°F.
The most common issue is simply that batteries die much, much faster in cold weather. New cameras often have larger energy storage (mine barely lost 20% over a night of shooting), but older cameras or those with smaller overall capacity can die within a single session and then suddenly perk back to 50% life when they warm up.
This is especially true for remote controls which may use watch batteries or AAA batteries which are impacted even more. So having an extra set of all batteries on hand tucked away in a warmer location like a pocket could be helpful.
From there, humidity concerns are always a risk as your breath may freeze on the equipment, changes when going inside will result in condensation, and more. These have been known to damage cameras in extreme circumstances. By the end of one session at -20°F, for example, the back side of my camera had notable frost buildup on it which I have to assume is not that great for camera health, although at the end of the day, my camera was fine (our guide told stories of those less fortunate, so this is indeed a risk).
Our photo guide recommended trying not to breathe directly on your camera when shooting outside, pointing the lens downwards when not taking photos (especially if there is precipitation), and possibly wrapping your camera in a beanie to minimize condensation buildup too. I will note I did not test any of these and am simply sharing what our guide told us. What safety precautions you may want to take is on you here.
Undo All Settings at End for Day Time Shooting
Finally, remember to reverse all your settings at the end of your night out. Turning image stabilization back on for handheld shots, switching back to your preferred method of shooting if not manual, knocking ISO back down, turning autofocus back on, perhaps reverting to Jpeg only from Raw + Jpeg, and more are good things to keep in mind.
I always recommend doing this at the end of a photography session as if you cannot remember all of the settings you changed you may forget the following morning. I have had many instances where I took my camera out days later after a unique shoot and couldn’t figure out why an image was overexposed, only to realize I forgot to change my ISO setting back.
So if you’re planning on shooting a scene other than night shots/aurora after going out, be sure to change your settings back to your typical default!
Do you have any tips for photographing the northern lights? Comment below to share!
✈️ Book Your Next Trip
- • Planning a trip? Find a flight deal.
- • In need of a room? Check out hotel and Airbnb prices.
- • Taking a cruise? Find a cruise itinerary for your journey.
- • Book a rental car or day tours to explore more as well!
- • Don't overlook travel insurance to protect your trip, too!
About Jeremy

About the Author: Jeremy is a full-time travel writer based in Pittsburgh and primary author of this site. He has been to 80+ countries on five continents and seeks out new food, adventure activities, and off-the-beaten-path experiences wherever he travels.