Published by Guest Blogger. Last Updated on February 25, 2022.
Disclaimers: Our site uses demographic data, email opt-ins, display advertising, and affiliate links. Please check out our Terms and Conditions for more information. Listed prices and attraction details may have changed since our visit and initial publication.
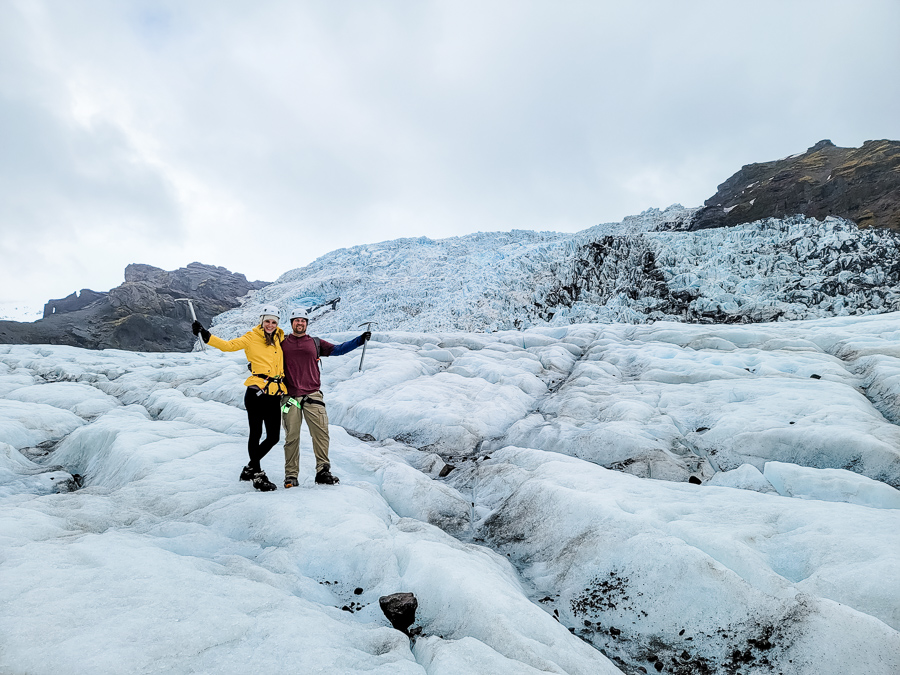
If you’re visiting Iceland, one of the coolest experiences you can have is hiking on a glacier! We did a 5 hour glacier adventure as part of our 7 day Iceland itinerary, and the landscape we observed hiking on the glacier was absolutely breathtaking!
Here’s everything you need to know about hiking the Falljökul Glacier in Iceland, so that you can have the best adventure in the epically cool Vatnajökull National Park.
The Glaciers of Iceland

First, a bit of introduction.
Glaciers cover more than 11% of Iceland, with the Vatnajökull glacier being the biggest. In fact, Vatnajökull is the biggest glacier in all of Europe, and actually makes up 8 of the 11% glacier coverage in Iceland
The Vatnajökull glacier system has over 30 different outlet glaciers, including the Skaftafell glacier and the Falljökul glacier (the specific glacier hike we’ll be focusing on here).
How to Hike the Glaciers in Vatnajökull National Park

To hike the glaciers in Iceland, you’ll need to go with a tour guide. It is not allowed to hike most of the glaciers alone, as it is an inherently dangerous activity. There are cracks and crevasses in the ice that you could fall into, so a guide is mandatory to lead the way.
Plus, it’s just convenient – the company provides transportation and necessary gear, such as crampons and an ice pick, that you need for hiking. Especially if you’re doing an Iceland campervan trip (a popular option in Iceland), it’s nice not to have to pack that extra gear.
What Company to Book Through

Now, there are a whole host of tour groups that operate in the Skaftafell/Falljökul area, but the best company and only one you should consider is Melrakki Expeditions.
Melrakki is owned by a young couple who have a passion for Iceland and the glacier. They keep the tour groups small – maximum 8 people – instead of some of the much larger groups other companies will take out.
Additionally, they drive you from the terminal center right up to the base of the glacier, so you can start hiking on the ice immediately. Other companies park half a mile away at the “parking lot”, and so you spend valuable time hiking on the dirt to reach the glacier.
Our guide was also very happy to adjust to our pace and requests (meaning, he was super chill when we wanted to take a ton of pictures, and often volunteered to take pictures of us, too). He also was eager to show us his favorite spots and go a bit farther in when it was clear we were up for the physicality of it.
Arriving at the Falljökul Glacier

So! You’re in south Iceland as part of your and you’ve booked your glacier tour with Melrakki. Here’s what to expect:
Meet up with Melrakki at the Skaftafell Terminal, where you’ll get outfitted with all the necessary gear you’ll need for the hike: a harness, helmet, crampons, and an ice pick.
If you aren’t familiar with crampons, they are essentially a frame with metal spikes that you strap onto your shoes to give you increased grip as you are hiking on slippery terrain, such as snow or ice.
Tips: Wear good hiking shoes/boots. Hiking boots aren’t strictly necessary, just wear something you feel comfortable hiking many hours in (in cold temperatures). However, there are boots for rent at the tour center for just a few dollars.
Then hop into the heavy-duty 4×4, as your guide drives you down the road to the starting point for the Falljökul glacier. Once there, you’ll put on your crampons and start-up on the glacier.
Melrakki specifically starts its tours and routes to avoid other tour groups – we only passed another group once or twice during our 5+ hours on the ice, so you really feel like you have the glacier to yourself!
The Beginning of the Hike

When you start hiking, the ice is relatively smooth, but also pitted in some areas, and is streaked with dirt. The lower you are on the glacier, the more dirt you’ll see in the ice.
You’ll start hiking up the glacier at a very moderate pace – you’re not booking it, but you’re not lolly-gagging either.
We were there during the summer, so the ice was a little softer, making it easier for the crampons to get a grip on. During the winter when it’s colder, the ice is a lot slicker, so you really have to pound your feet in to get grip!
Pretty soon, you’ll have gained enough vertical elevation to get good views over the valley!
As you climb, the guide will point out spots where the ice has receded – over recent years, global warming has led to significant loss of the ice pack in Iceland.
You’ll also walk by different crevasses and holes in the ice – some of them are totally safe and you can go right up to them, others are more dangerous and you’ll need to give them a wider berth.
Higher Up on the Glacier

As you get higher up into the glacier, the ice gets cleaner and cleaner, the views over the valley get more impressive, and the structures of the glacier itself get SO COOL!
There are more ridges and canyons, ice tunnels, streams, and you approach a massive, towering cliff face of riven ice.
You will start seeing craggles in the ice, and spots where the ice has veins of blue through it – a truly awe-inspiring sight. You think the blue in the pictures must be fake – it isn’t! And it is actually better in person than the pictures.
At the farthest point of the hike, you get really close to the glacier wall. The ice in front of you rises up in a cliff, towering over you, full of craggles and intricate formations. It was immense and majestic, but there was also a sense of precariousness, as things could shift and change at any time.
You sometimes heard cracks from up above, as something in the ice broke or shifted.
While we were enjoying lunch, we commented on a chunk of ice nearby that seemed to be barely hanging on, and as we were walking back down, we happened to see it split from the cliff face and fall off! (This was never a dangerous situation, even if we had been close when it happened, as the piece was still well above us and behind several ridges.)
The higher portion of the hike also had an almost alien or otherworldly landscape and feel – in fact, the scene in Interstellar on the ice world was filmed on this glacier.
Also near the farthest point of your hike, you’ll come to a little glacier spring. You’re high up enough at this point that you can actually drink the glacial water straight from the ground – as long as you’re willing to earn it!

To earn your drink, you need to get in “pushup position” and lower yourself down to take a sip of the water. That water was probably the crispest, clearest, most delicious water I’ve ever drunk! After that first sip, we filled up our water bottles with that water and enjoyed it the rest of the day.
Finally, high up on the glacier, you’ll stop for a little lunch. Bring some trail food with you, as you’ll definitely be ready to eat at this point!
After that, you’ll head back down the trail and out of the glacier.
Beyond the adventure aspect of hiking the glacier, this also felt like a great cultural experience as well, as our guide was incredibly interesting to talk to, sharing lots of fun facts about Iceland, glaciers, the climate, traditions, his upbringing, etc.
He also shared some great recommendations of places to eat and hidden gems to visit in the area!
Final Thoughts and Tips

Make sure you bring: Good footwear for hiking, cold weather gear as needed (warm coat, hat, and gloves), plenty of water, and some trail food for lunch.
Melrakki offers a couple different Iceland glacier options: a 3-hour hike and a 5-hour hike. I would highly, highly recommend you do the 5-hour hike! The coolest parts of the glacier are in those last 2 hours. It was SO worth the extra time and money to do the longer hike.
If you are concerned about your ability to do a 5-hour hike, I will say I did not find the hike to be overly exerting. It helps that you make plenty of stops to take pictures, examine a crevasse or ice structure, and admire the view.
There is also a different hiking experience offered in winter. While summer hikes are entirely on the top of the glacier, in the winter you can go inside the glacier itself – exploring the ice caves that were carved by the summer melt!
When you visit Iceland, hiking the Falljökul glacier is a must-do bucket list experience and one you will not soon forget!

All images were provided courtesy of The Unknown Enthusiast.
✈️ Book Your Next Trip
- • Planning a trip? Find a flight deal.
- • In need of a room? Check out hotel and Airbnb prices.
- • Taking a cruise? Find a cruise itinerary for your journey.
- • Don't overlook picking up a rental car or day tours as well!